PCBGrip makes it easier to assemble electronics. It holds everything in place while providing full access to the work. The complete range is available in our shop.
Team MakerBeam.eu
PCBGrip makes it easier to assemble electronics. It holds everything in place while providing full access to the work. The complete range is available in our shop.
Team MakerBeam.eu
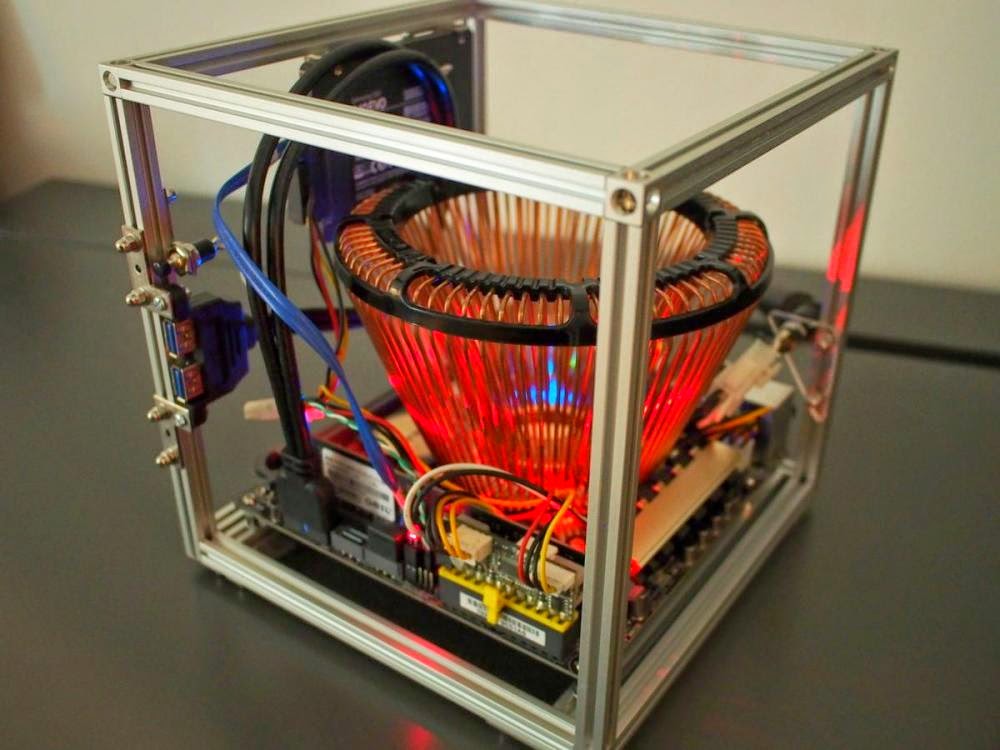 Max made this project with selfmade custom lengths. The beams were 200mm and then cut to 185mm.
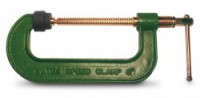
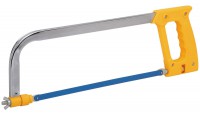
Max his tools: clamps and a hack saw.
“Hi,
So I ordered another lot from chartup.com and when this lot arrived they were the new version where the centre holes goes all the way through. Excellent! I cut them to length using clamps and a hacksaw in my kitchen. Then tapped the threads using an M3 tap, a power drill and some bicycle chain oil. It all worked perfectly so it is possible without proper tools 🙂
Thanks,
Max”
If you want to know more about Max his project please visit the fanlesstech website: http://www.fanlesstech.com/2015/01/nofan-cr-80eh-build.html
Thank you Max!
Team MakerBeam.eu


Unfortunately we discovered some 1000mm OpenBeam that have distorted ends. The tips were squeezed together as if they were handled by strong pliers on that end. Leaving the tips twisted and the holes oval instead of round.
We quickly inspected some packs and indeed found other beams that were distorted this way. This inspection also gave us the insight that it was a production failure rather than us packing the beams the wrong way. There were packs with distorted and non-distorted beams wrapped together. These tips should have been cut off in the production process.
Upon a closer inspection we have come to the conclusion that the distortion appears almost exclusively in the longer lengths OpenBeam. This means the beams of 600mm, 750mm, 1000mm and 2000mm.
Last week we sent an email out to the OpenBeam customers who possibly have bought affected beams from this batch. This way we can work out some form of compensation for these customers or simply replace the affected beams with good beams.
We are very sorry for this to happen. Naturally we are in contact with out manufacturer as to make sure this does not happen again.
Team MakerBeam
We would like to share with you a work-in-progress, but still an inspiring project: creating a PCB and component holder, which is designed to make soldering easier.
The project is running in the hands of Mark Swinhoe, and he shared with us a little background about it.
“This little tool was inspired by how expensive professional PCB holders are, and how they immediately reminded me of MakerBeam. The holder allows you to angle the component, and use the mounting holes to keep it in place.

The vertical beams can be easily loosened for different width of components and the PCB standoffs slide up-and-down the vertical beams for height adjustments. If you need more space from the vertical bars, then you can add another set of standoffs on top of the existing ones, or just attach longer standoffs. The components are held really well with MakerBeam, and it has a very solid base.” – (by Mark Swinhoe)

Mark, thanks for sharing it with us. We wish you more fun with it and a successful result. We hope, that we can see your robot running-around soon.
Team MakerBeam
 Wandy is designing an antenna rig with the capability to track its wifi AP via GPS and motion sensing. This rig is designed to be installed on maritime vessels in order to provide a high quality wifi link to shore based access points. The built-in GPS receiver will give the rig its current position and heading and calculates its angle towards the shore based AP.
The shore based AP locations are hard-coded into the rigs software, and compared with the rigs current sector in order to allow several different AP’s to be registered according to location. This current model has not got the gimbal system installed yet. This will counter wave movement of the ship by motion sensing and keep the antenna levelled with the AP.

This prototype was built using Makerbeam. Makerbeam gave us the flexibility to quickly change the design in order to develop new features. The first housing, was 10 x 10 cm and turned out to be too small to fit the embedded router-board. Changing the dimensions was as simple as changing your socks, and in no time we had a larger base.
One of the things that makes Makerbeam so well suited for this project is its aesthetic properties.The black anodised beams have a beautiful finished look to them. With a couple of black polystyrene sheets and a Stanley knife, the prototype looks the part in a matter of minutes.
The threaded beams enabled us to use the corner cubes and this gives the prototype a real design look. Makerbeam enabled us to make a prototype we can actually show to potential customers without having to make too many excuses.
In the video you will see the device waiting for a GPS lock and doing a calibration by the flick of a switch. Note the awesome design lights on the bottom of the rig.
Ammer van Bussel
Netwerk engineer
Wandy
We found a possible “candidate” for the new storage box. It tested good. According to our experience it’s a really good quality plastic box with lots of useful features: e.g.: click-on lid locking system, 2 levels for storing… Ideal for storing and separating the smaller pieces, and has spacious place for even the 300 mm beams. Here are some photos to give a little hint how it looks and how the MakerBeam / OpenBeam items fit in it. We still search a bit further, but maybe you will meet with this one in our product range.


 Team MakerBeam
Because of the terminated production the MakerBeam Storage Box is not available at the moment. We are searching for new solutions/sources, that we can offer instead, and we let you know if the new box is available.
The more possible sources we have, the more suitable solution we can find. So, if anyone has an idea or contact for sources of plastic box that is ideal storage place for different sized beams, nuts, bolts brickets and other accessories, please share it with us. Thanks in advance!


For us the MakerFaire started with this picture online, see below.

We were preparing a family visit to the Hannover MakerFaire.
MakerBeam was represented at the MakerFaire in Hannover by Chartup.
Thank you Anton!!
Saturday July 5th Johan travelled to Hannover to visit the Hannover MakerFaire. Since MakerFaires are fun for the whole family I followed later with our boys.
On Saturday he would focus on business. Sunday was scheduled for the pleasure part.

Some impressions of the pleasure part.


We had a great trip and wonderful days. Loved it!
Author:
Marlies de Stigter
Team MakerBeam
Introduction
Everyone of you who already used MakerBeam knows how difficult or rather time consuming it is to construct a corner out of three beams. Beside that, it costs a lot. You need up to three L-Shaped brackets, 12 bolts and 12 nuts. A new product solves this issue. It is a so called ‘Corner Cube’: a single piece of aluminum and three screws.
The biggest advantage of this new product might be that you can finally construct cubic corners. With the old method, using the L-Shaped brackets, you could not construct a cube as one beam was always “sinked” into the other. The new Corner Cubes connect the beams at their faces and therefore it becomes possible to create cubes as shown in this picture below.

Stability
Let’s start with the most obvious factor, stability. So far, we have all been used to the flat brackets which are screwed onto the beams with two screws per beam. The resulting joint provides a very stiff connection, see left picture below. It is obvious that the Corner Cubes will not provide the same joint strength due to their different design. However, our tests showed that this will not be of any issue for most applications. If required, the connections can be reinforced using the 90° corner brackets as shown below to the right.


Precision
This point is probably not that obvious at first, but after some thinking it becomes clear that the precision of the cubes themselves and especially the tolerances across different cubes matter a lot.
We have taken some measurements and the results were quite satisfying. From 12 cubes, we’ve found none that had difference from side to side larger than 0.1mm. A comparison between the dimensions of the 12 cubes lead to the same result: they are all equal to each another within a tolerance of 0.1mm.
Compatibility
The Corner Cubes only work on the new MakerBeams which have a threaded hole at each end. Therefore they can not be used with your current set of MakerBeams unless you have the tools to make a hole and wire tap the ends yourself.
This is also a limiting fact when it comes to custom sized beams. As the threaded center hole at the end of each side is not continuous, you also have to bore a new center hole and cut a thread yourself. However, only few people might have the tools and the knowledge to do this. Good thing that you can still use the old method!
Costs
Finally, let’s take a more detailed look at the costs. As mentioned earlier, you need quite a lot more pieces to build the traditional corner.
| COST COMPARISON CORNER BUILD | |||||||
| Corner Cubes | 90º L-brackets | ||||||
| Piece | Price | Quantity | Total | Piece | Price | Quantity | Total |
| Cube | €1,06 | 1 | €1,06 | L-Bracket | €0,65 | 3 | €1,95 |
| Bolts | Included | – | Bolt | €0,06 | 12 | €0,72 | |
| Nuts | Not needed | – | Nut | €0,03 | 12 | €0,36 | |
| TOTAL | €1,06 | TOTAL | €3,03 | ||||
A traditional corner costs you €3,03. Compared to the €1,06 you have to pay for a ‘Corner Cube’ corner, that is quite a lot! Note: You can use just two 90° brackets to create a corner but then not each beam will be connected to both others.
Conclusion
The Corner Cubes do not only make it possible to create cubic corners, they are also about three times cheaper. Should you already own the new MakerBeam with the threaded hole at the ends, the Corner Cubes only drawback are the lower stability compared to the traditional method. However, it is possible to use the 90° corner brackets to reinforce the construction.
Author: Joel Bodenmann of B-Electronics
The corner cubes arrived yesterday (May 15), late in the afternoon. While I was excited, made a few packages and started emailing customers, Johan tested some cubes and was not entirely pleased. What he discovered is that micrometers matter.

It looked like the special countersunk bolts did not sink as deep in the cube as should. First there was a sense of disbelief. The corner cubes are from the same manufacturer where we ordered our first batch from. Only for this batch we opted to have the cubes anodised.
Then we thought it maybe was a flawed screw. The particular screw used in that instance had an extra rim as Johan noticed. Other screws in the pack looked fine and tested fine, or did they?
Using a hex key driver and some force they looked okay. At that point we did not know whether it was this flawed screw or whether these cubes are different. Ever so slightly different and with the naked eye hard to identify. Especially in a hurry since I wanted to ship out backorders!
Later that evening we did some more testing and found that this batch of corner cubes is indeed different. The bolts do need sink in as deep. We are talking micrometers here. Here is a picture below.

We contacted the manufacturer. They are not to blame here. The difference is within their tolerance. There is a little room left. We made new drawings and are working on producing a new batch. Meanwhile we are thinking of reworking these corner cubes, 4000 pieces!
Johan did some testing on that as well. Here is picture with a reworked cube.

So for now it is back to the drawing board. Hope to have new, excellent, cubes here as soon as possible!!
p.s. The corner cubes were reworked and are back in stock.
We also worked on resolving the problem in the next batch. (20140613)
Author:
Marlies de Stigter
Team MakerBeam