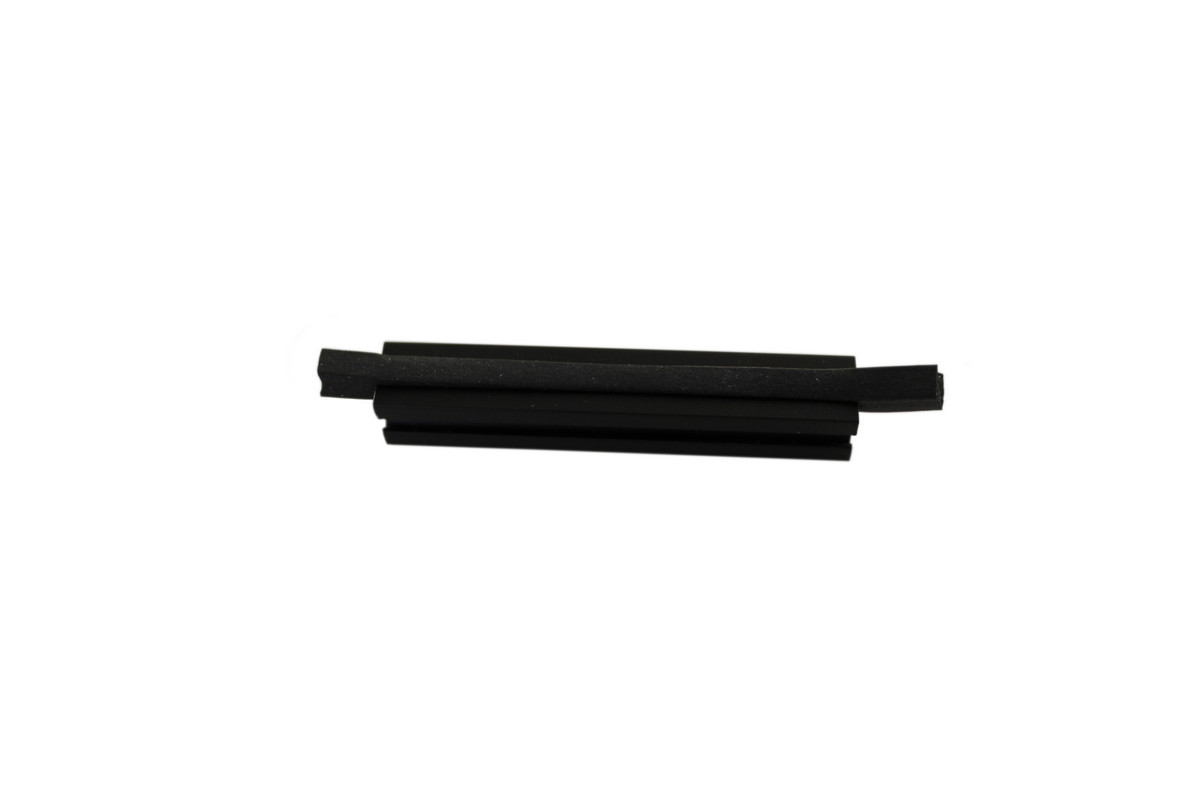
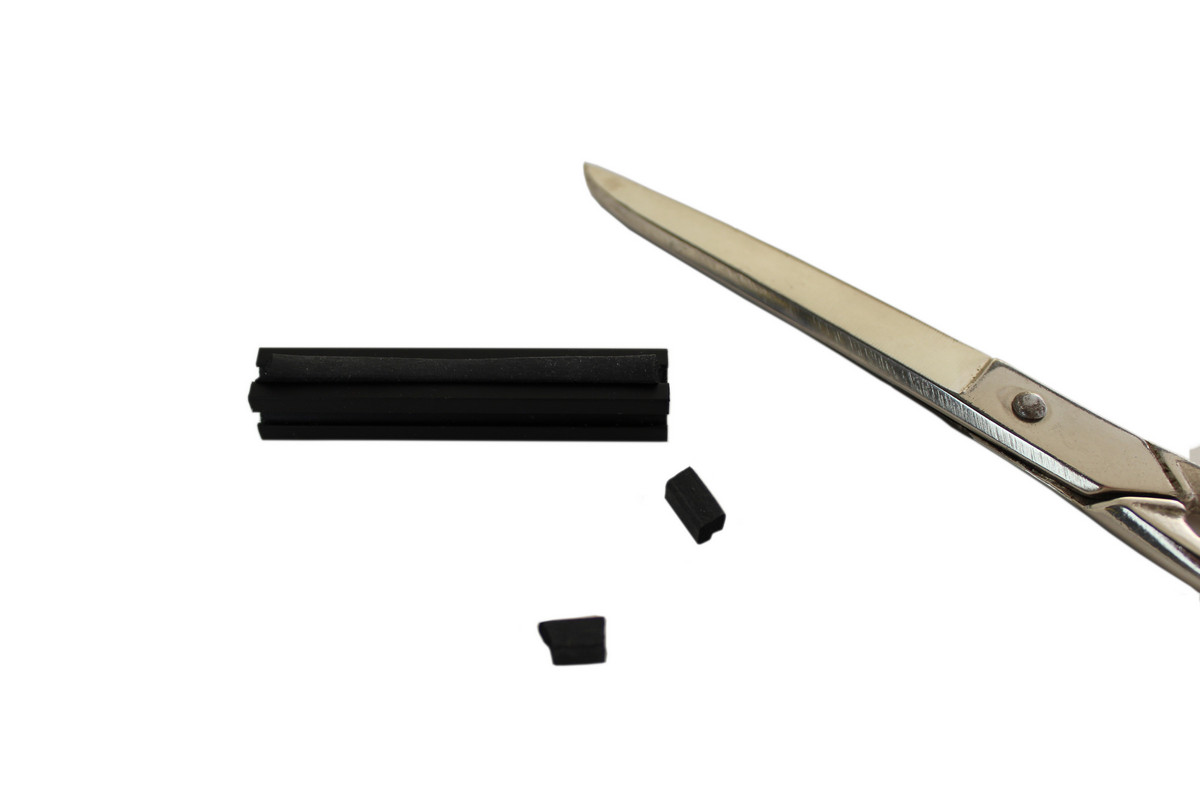
We added a new small product to our product range: sponge rubber rectangular cord 5x5mm for MakerBeam (10x10mm), article number 104454. The rubber cord can be used to create surface protection. Or protection for something else like a tablet, see the tablet stand below.
The cord only barely fits the T-slot of MakerBeam (10x10mm). Part of the rubber will stick out and create a cushioning band.
The sponge rubber can be easily cut into the desired custom lengths. You have to stretch the rubber somewhat to fit the T-slot, see pictures.
The 5x5mm cord will only fit the MakerBeam (10x10mm) like this. We are working to introduce an alternative for MakerBeamXL and OpenBeam shortly.
Vincent Mensink of Studio Mensink is a regular customer. He works on product design and special props and effects. He has to come up with ingenious constructions to make these designs work. He loves MakerBeam (10x10mm), MakerBeamXL (15x15mm) and OpenBeam, especially the profiles anodised in black.
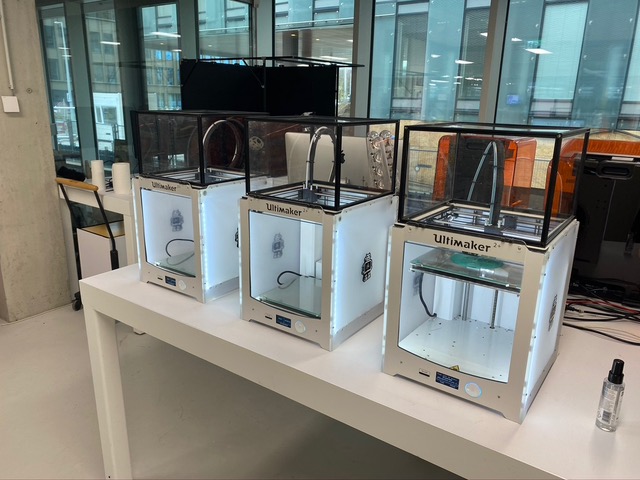
MakerBeam is used a lot in combination with items that are ready available and custom 3D printed items. To create these custom 3D printed parts he has a few Ultimakers lined up.
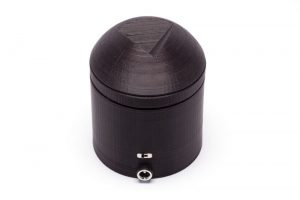
You will notice the dust covers on these Ultimakers. These covers were especially designed by Vincent to fit the Ultimaker. You can find the special designed brackets and the bill of materials on Thingiverse. You can also find the bill of materials below.
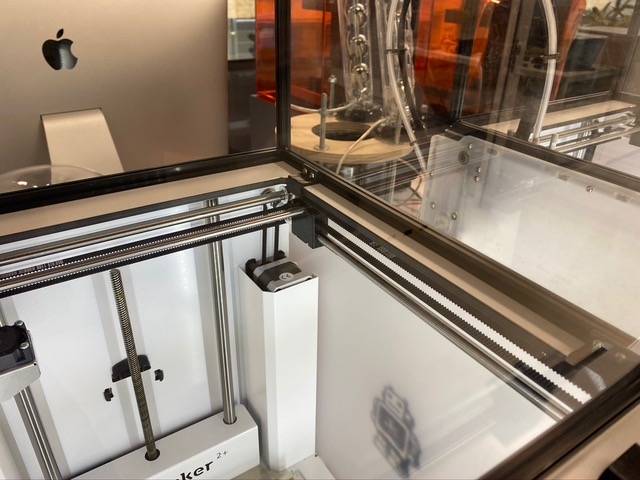
Dust cover designed for the Ultimaker 2+
The Acrylic lasercut plates slide into the MakerBeam frame. The 3D printed brackets lock the cover into place.
Hendrik-Jan is a student who just started his bachelor studies in electronics September 2019. He made us a pancake machine.
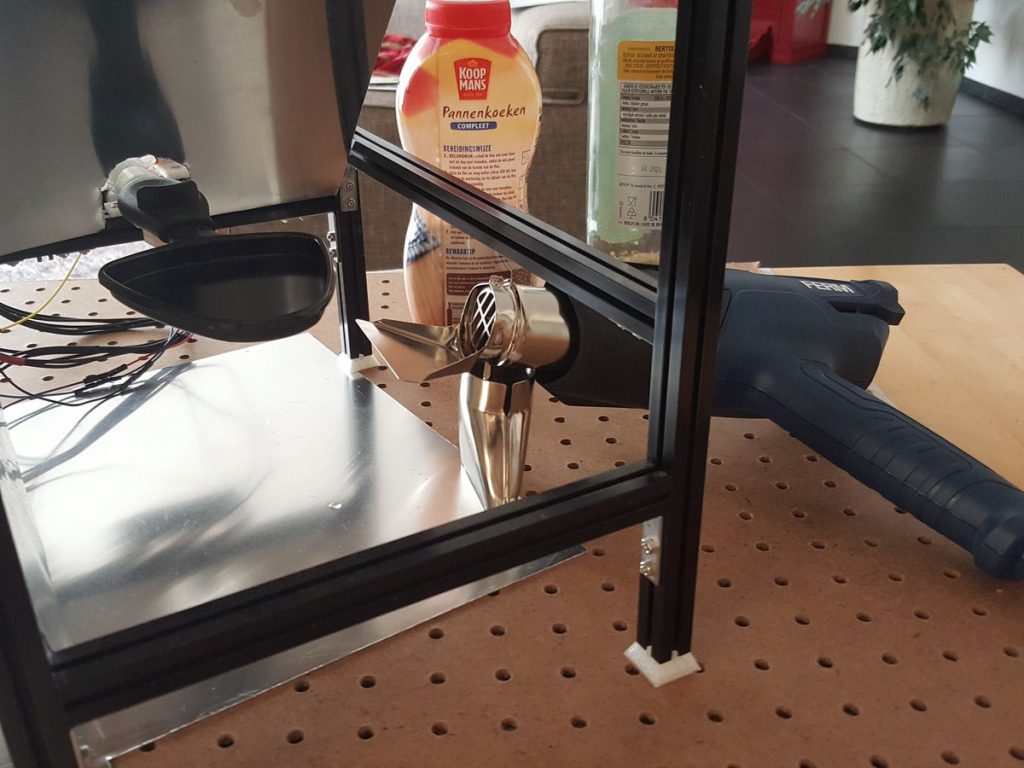
Heating the pan was a bit difficult. Hendrik-Jan considered using a the heating module of a blowdryer. But this proved to be to challenging and time was running out. Before the start of his bachelor studies the pancake machine needed to be finished. He chose to use a heat gun.
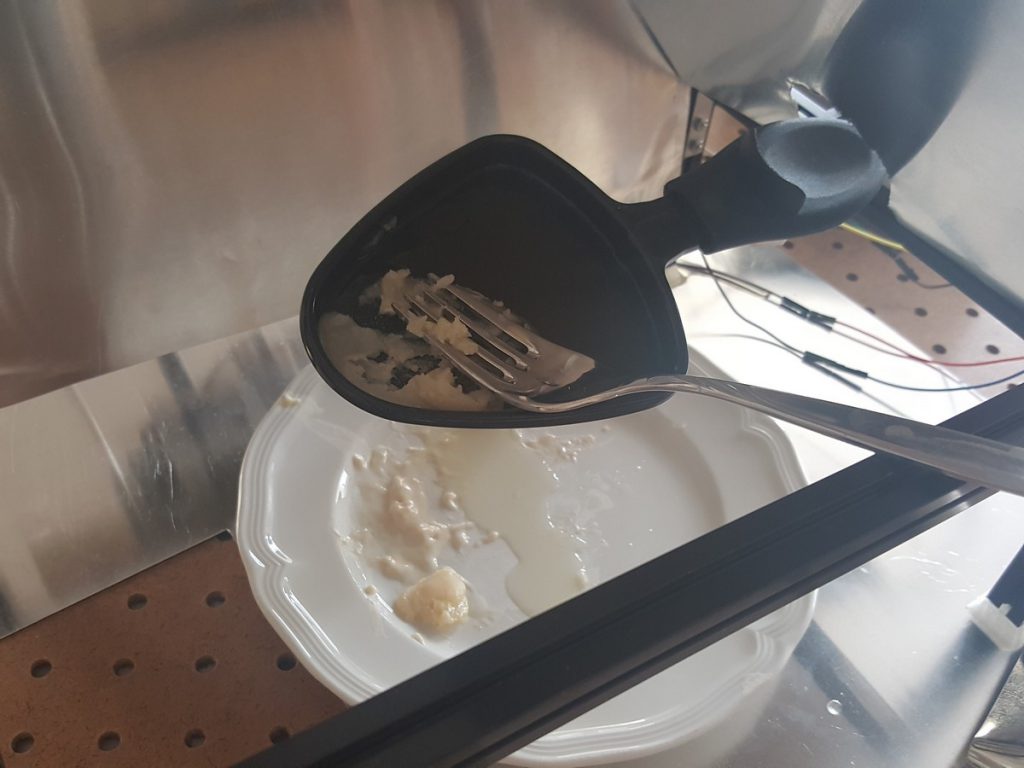
The tilting of the pan worked well, but the sliding off never really happened. The pancakes never got baked really well. The pancake would almost burn into the pan. So that it would not fall out of the pan when you turned round. No matter how much oil was in the pan. This probably happened because the temperature of the pan became too high. The oil burned away a bit and with it the batter that touched the pan. Adding a temperature sensor to the pan that could act as a thermostat could fix this problem. Hendrik-Jan considered such a system, but chose not use one. It would have been both challenging to mount a temperature sensor to the pan and would have made the code a lot more complex. What he instead hoped for was that he could regulate the temperature of the pan a bit by aiming the gun on the right spot on the right distance from the machine.
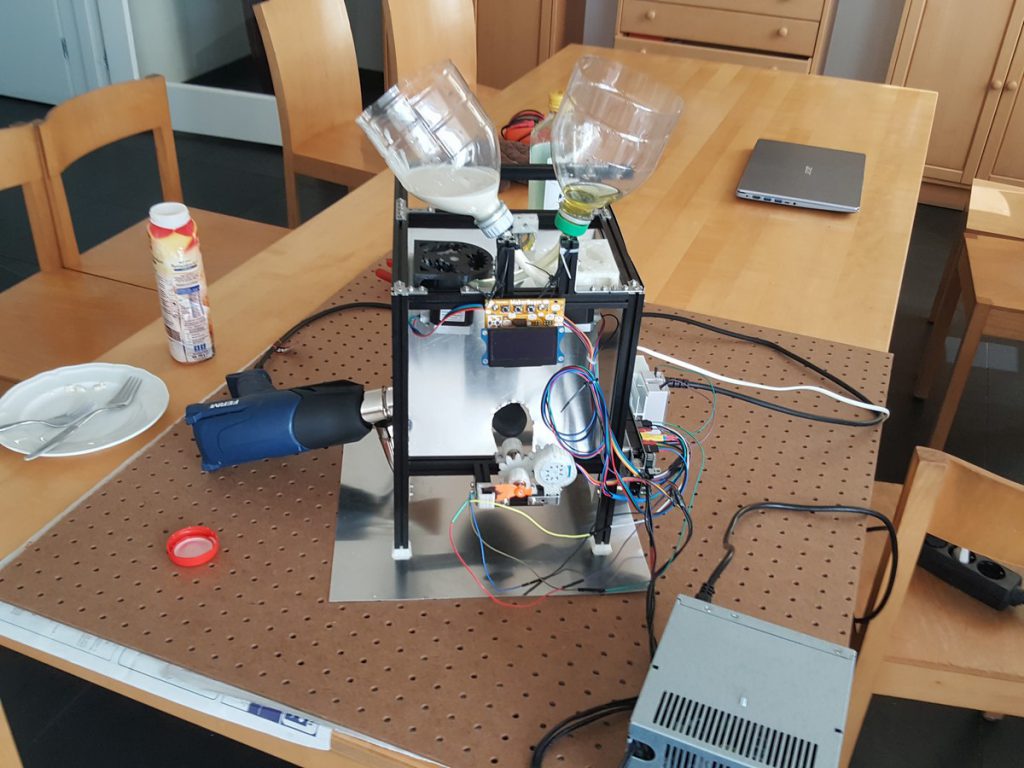
The pumps worked well. They only have have one problem. There is still a tube of approximately 20 centimetres until the tube ends above the pan after the fluid is pumped from the reservoir through the pump. Oil and batter slowly drip into the pan instead of falling all at once. There should be a vacuum in the tube to prevent this. The tube that was used is pretty wide, so this vacuum to hold the fluid in place was not there. This meant that after pumping, the fluids would still leak out of the tube for a pretty long time. In retrospect Hendrik-Jan thinks that the best way to solve this is to let the pump retract, just like 3d-printers do with their filament. This means that after pumping the fluids to the pan, it would pump back a little bit so that the tube after pumping is empty.
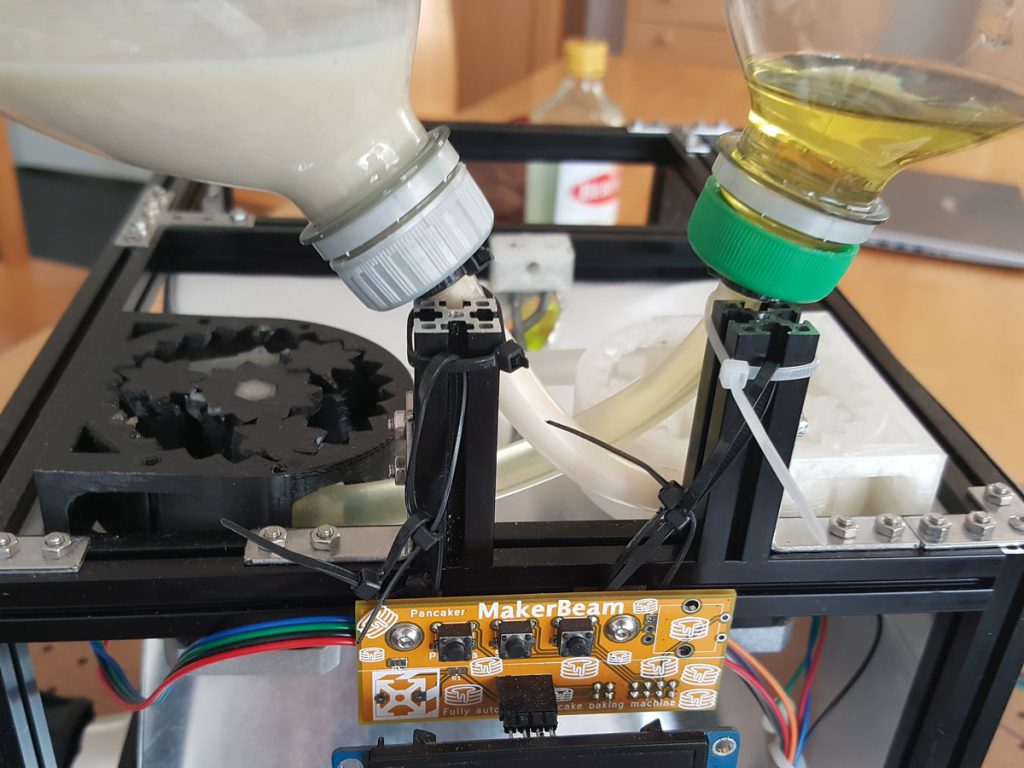
As a reservoir for both the butter and the oil, Hendrik-Jan used a PET-bottle neck. He could easily hot-glue the tube into a bottle cap. The reservoir on the right (figure 5) leaked a bit though, eventually leaving a mess everywhere. In hindsight a funnel maybe would have worked better.
Even though the machine did not really work as a fully automatic pancake machine Hendrik-Jan is still pleased with how the machine turned out. He learned a lot in the process of making and testing the machine. The use of MakerBeam profiles made it possible to divide the making of the machine into separate projects without having to worry about the whole. All the created elements could always be fastened to the MakerBeam framework anyway. This meant he could focus on one project at a time without having to worry how the created element in that project would fit the whole.
Hendrik-Jan is a student who just started his bachelor studies in electronics September 2019. Hendrik-Jan made us a pancake machine.
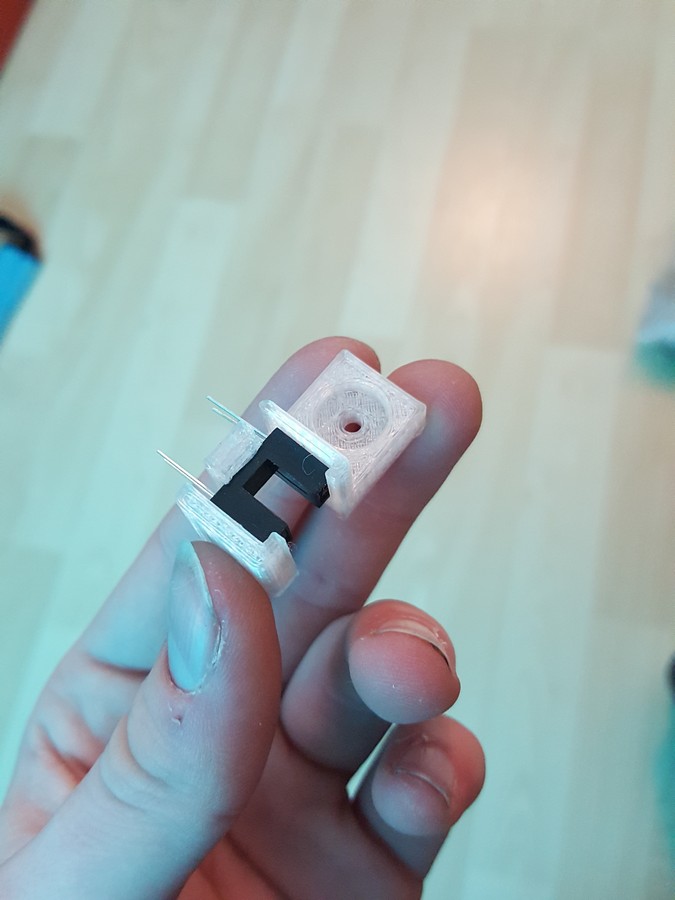
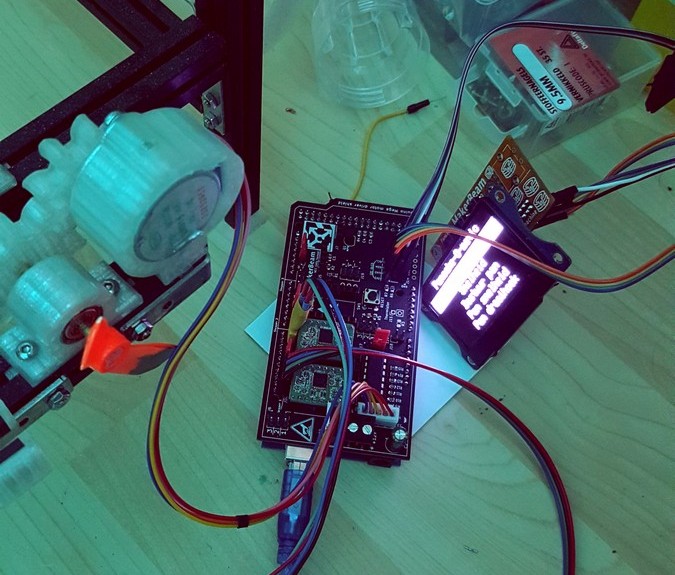
Hendrik-Jan made a special PCB for the control panel. The control panel is used to home the pan, see video below.
For the homing of the pan a sensor was used. Hendrik-Jan used an optical switch with a RC propeller to block the light. Although this worked reasonably well, the optical switch appeared vulnerable. Throughout the process of making the machine 4 sensors were broken. It was not clear why this happened. There are a number of other options. Like using a hall-effect sensor with a magnet for example, or he could have gone with a simple micro-switch.
This is the penultimate blog post highlighting the pancake machine.
Hendrik-Jan is a student who just started his bachelor studies in electronics September 2019. Hendrik-Jan made us a pancake machine.
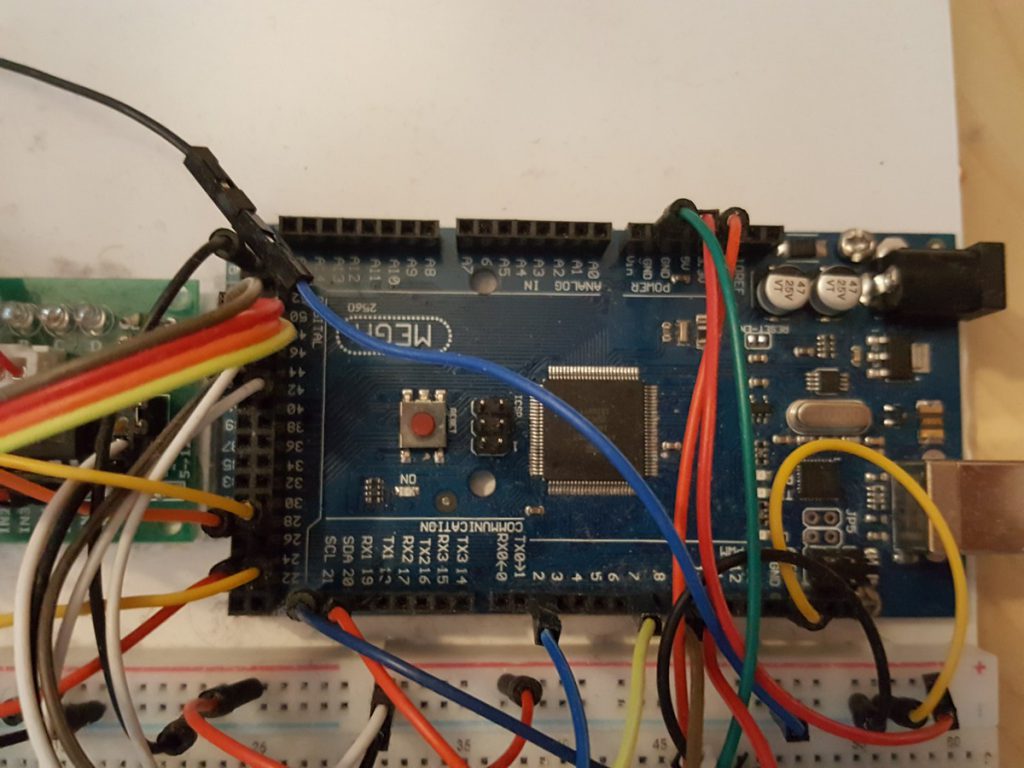
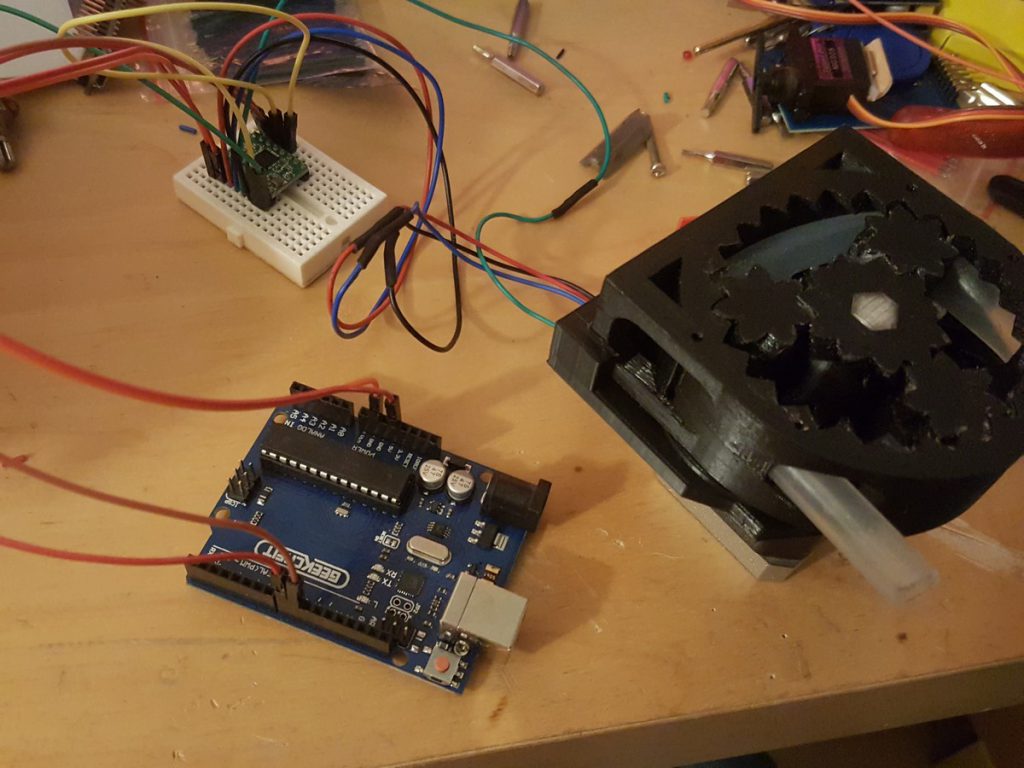
An Arduino mega was used as a microcontroller for the machine.
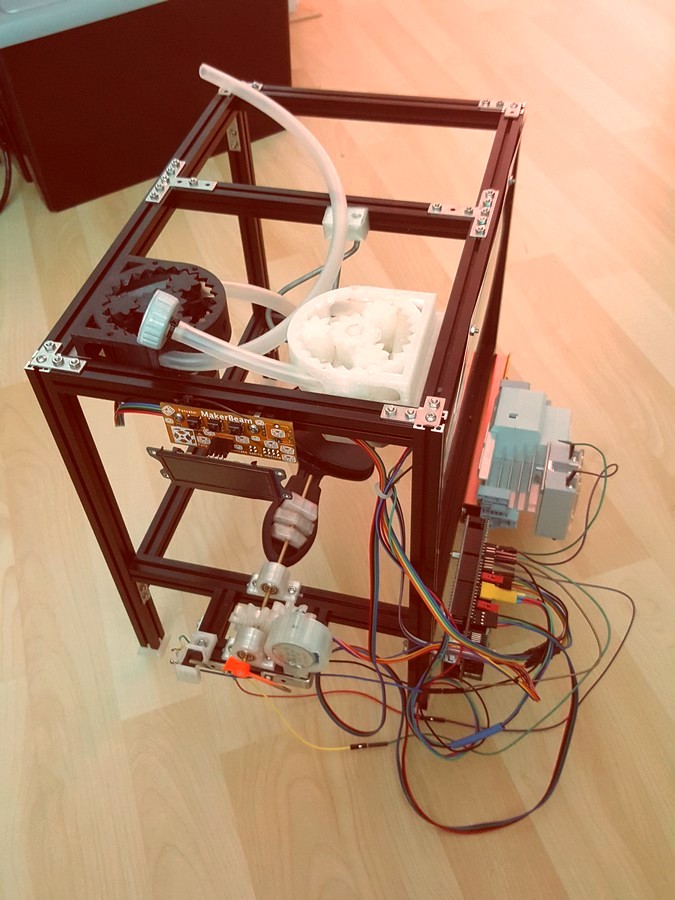
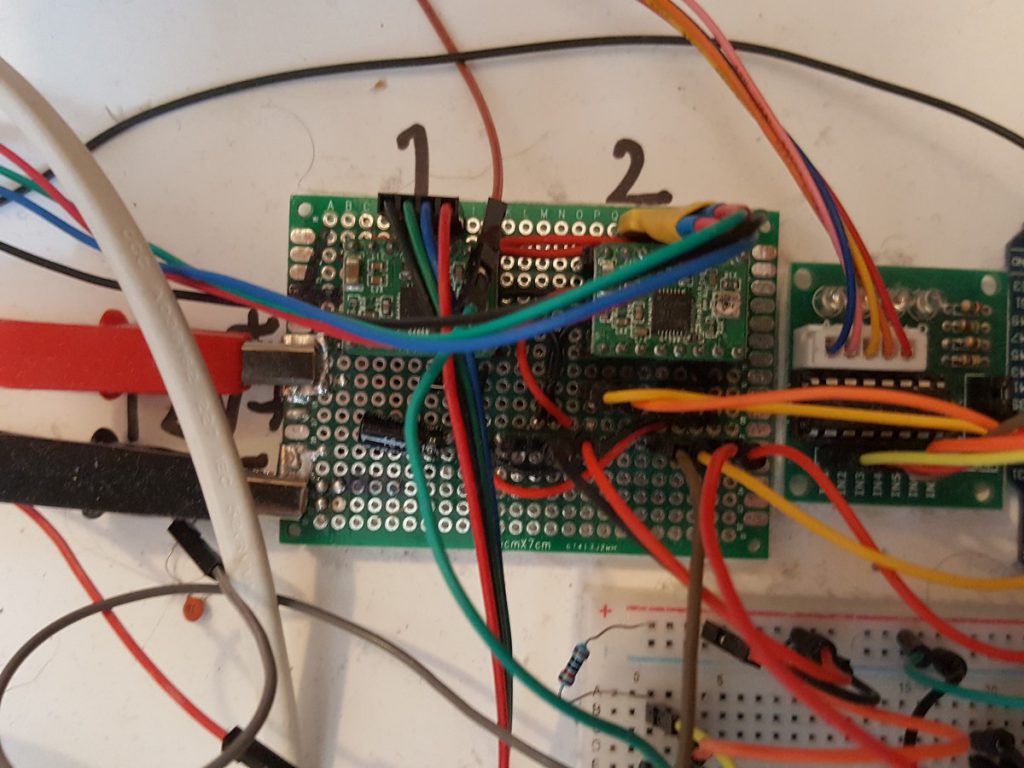
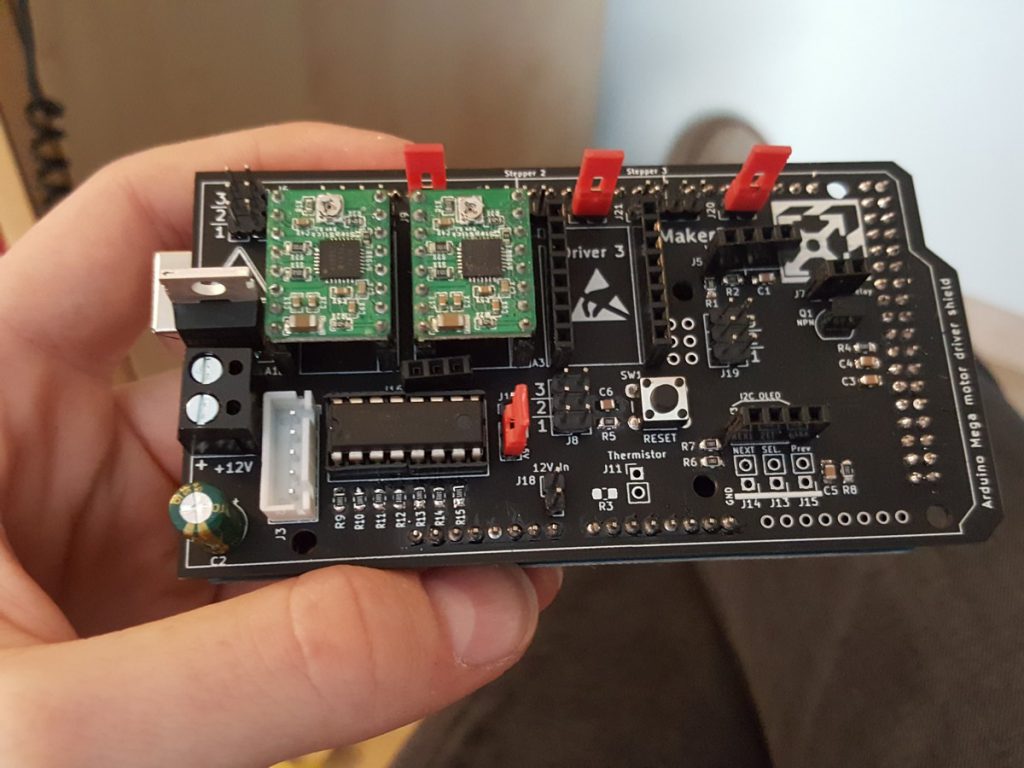
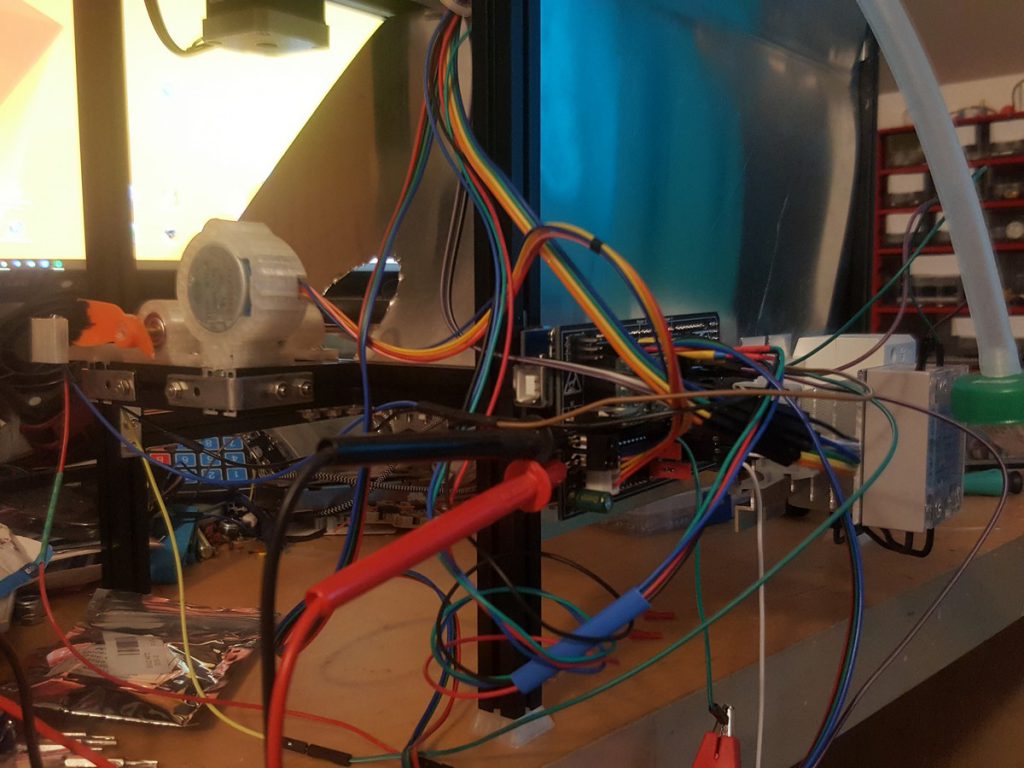
During the process the wiring of the machine really became a mess, see above. Hendrik-Jan decided to make an expansion board for the Arduino mega, see below. This reduced the number of wires and made it all a lot simpler.
Hendrik-Jan also created a PCB with a control display.
Although there were two custom PCBs designed for the machine there still were quite a lot of wires hanging around the machine.
The reason for this was that Hendrik-Jan wanted all the cables to be pluggable. This meant that he had to use 8 separate jumper cables, only to connect the mainboard and interface board together. He recently found out about IDC-connectors which you can easily press onto a flat cable at home without the need of special pliers. He would recommend using these instead of what he did.
Hendrik-Jan is a student who just started his bachelor studies in electronics September 2019. He made us a pancake machine.
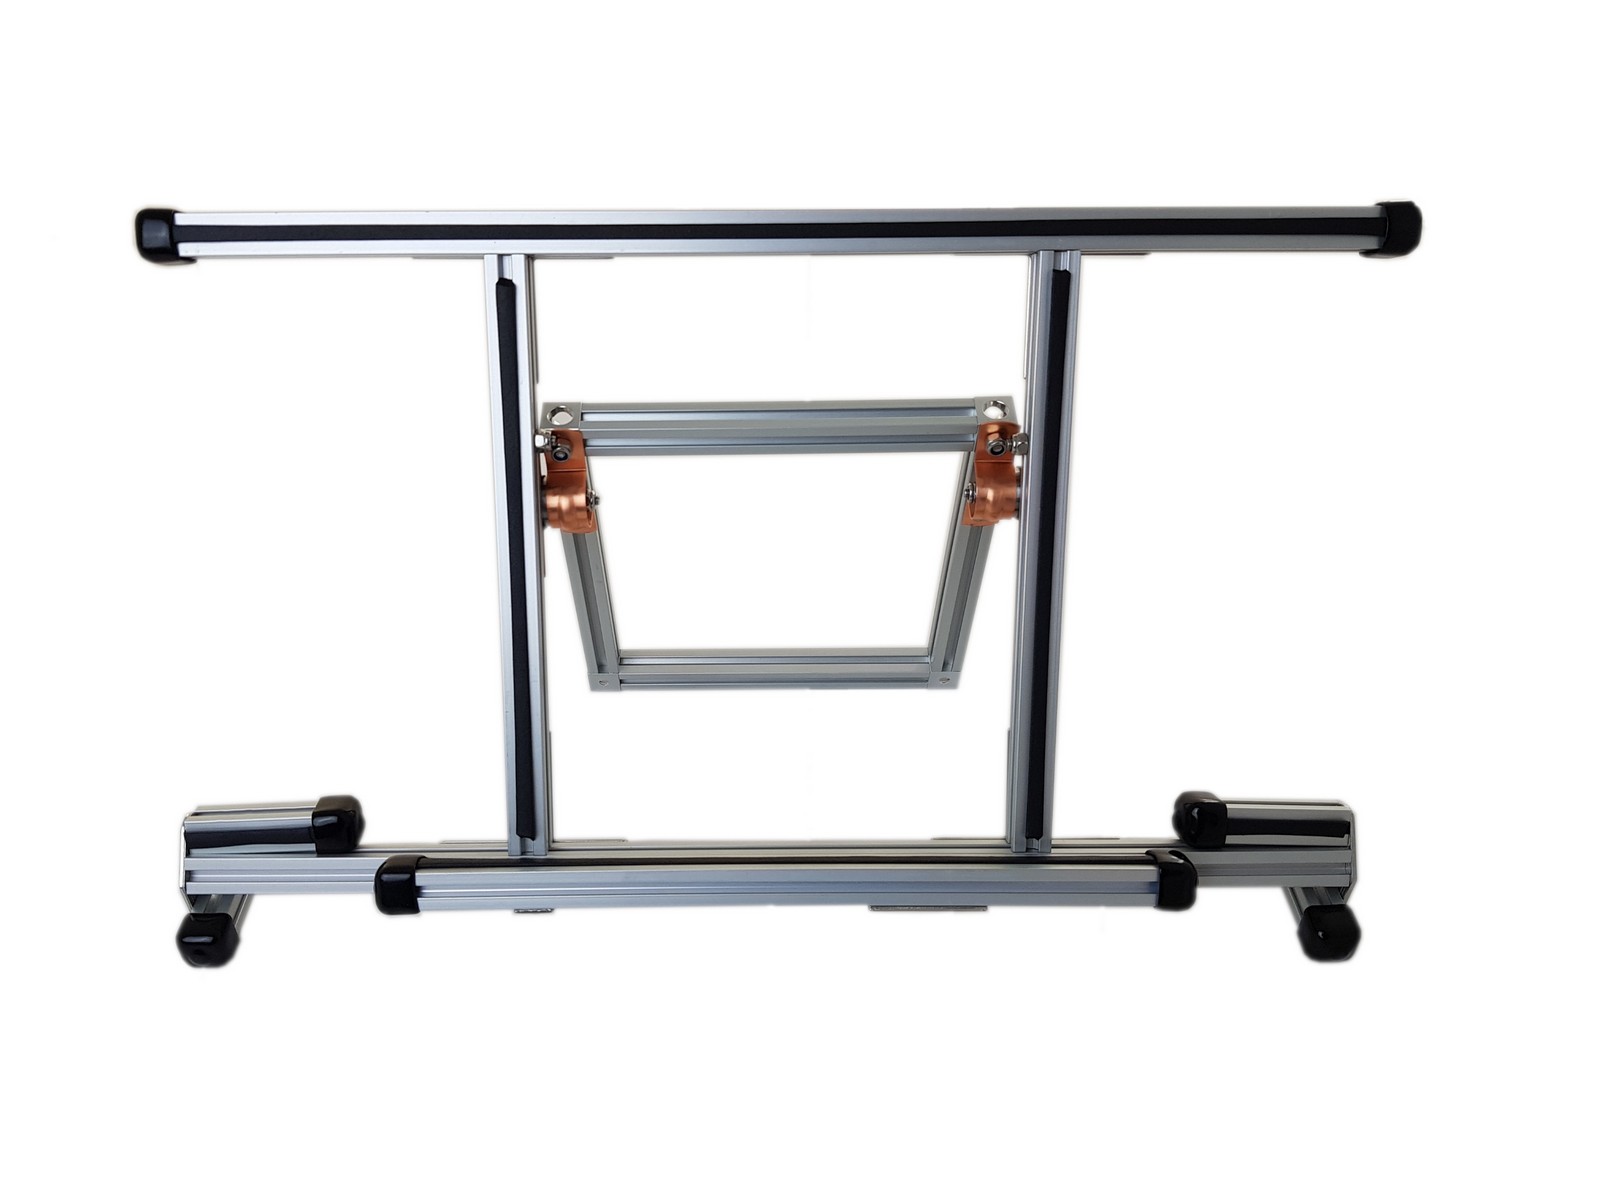
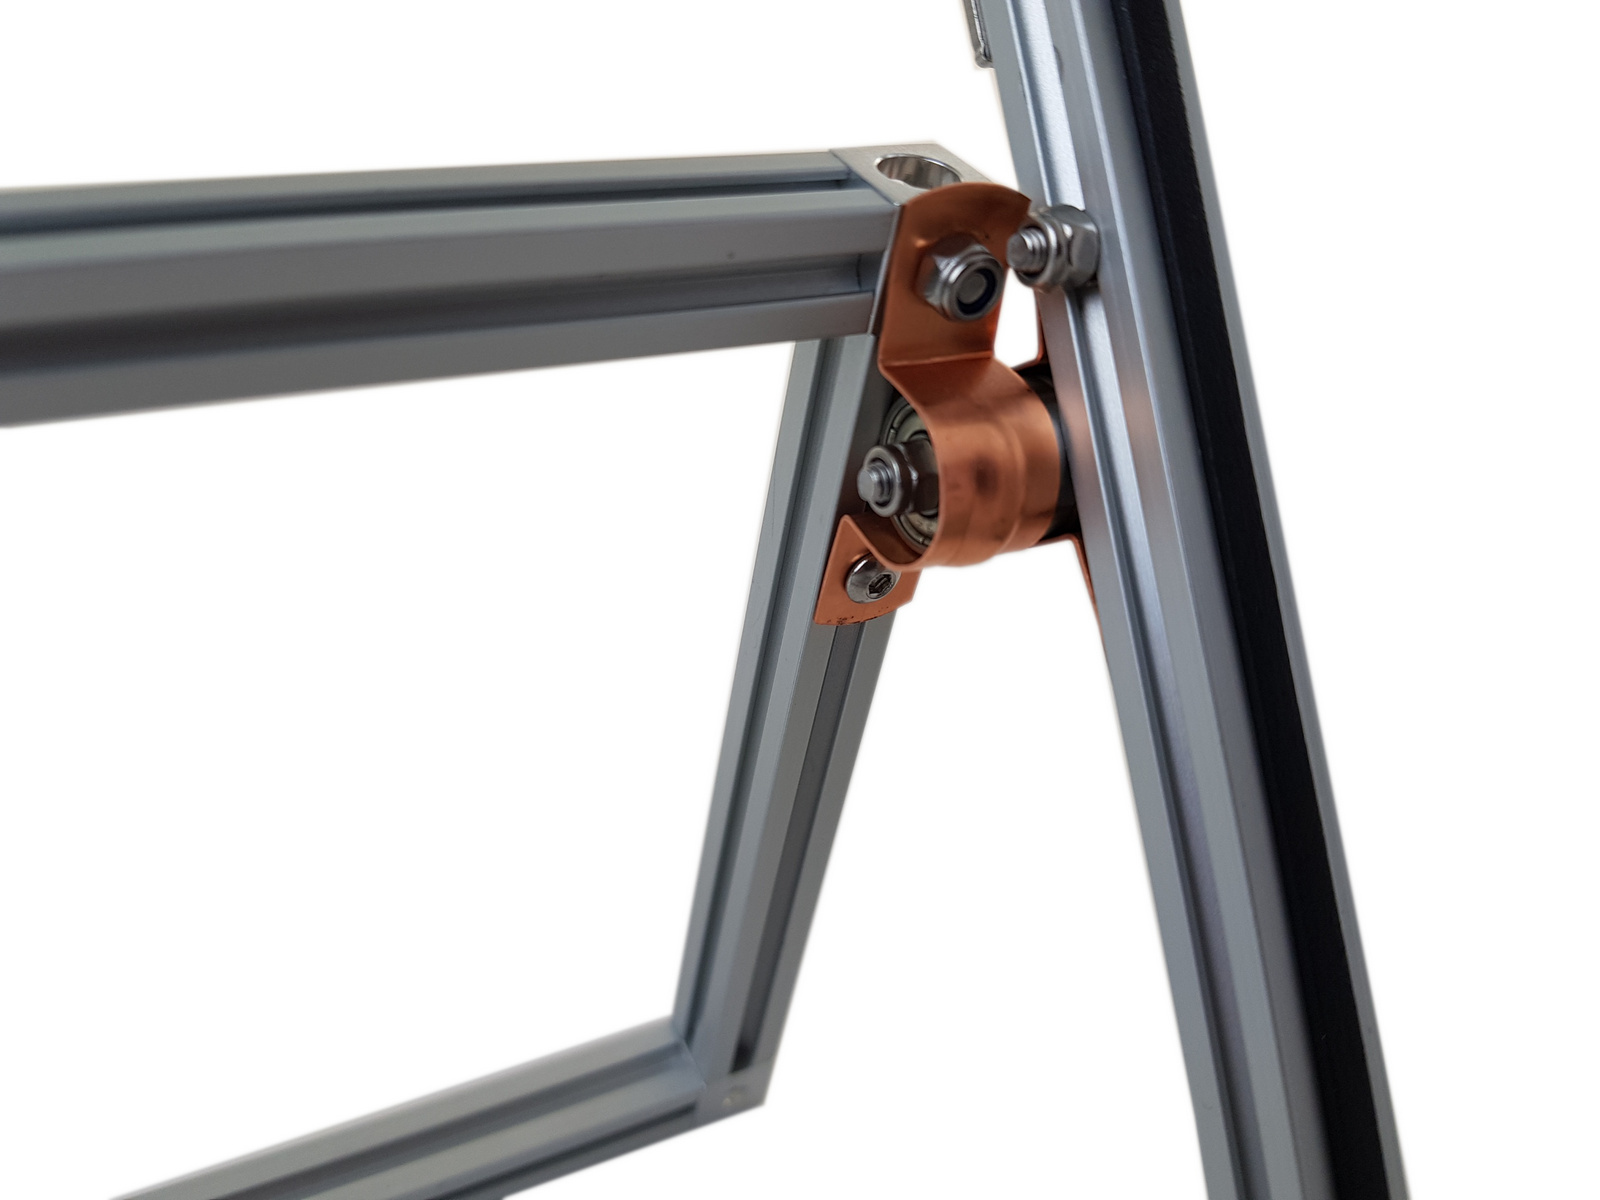
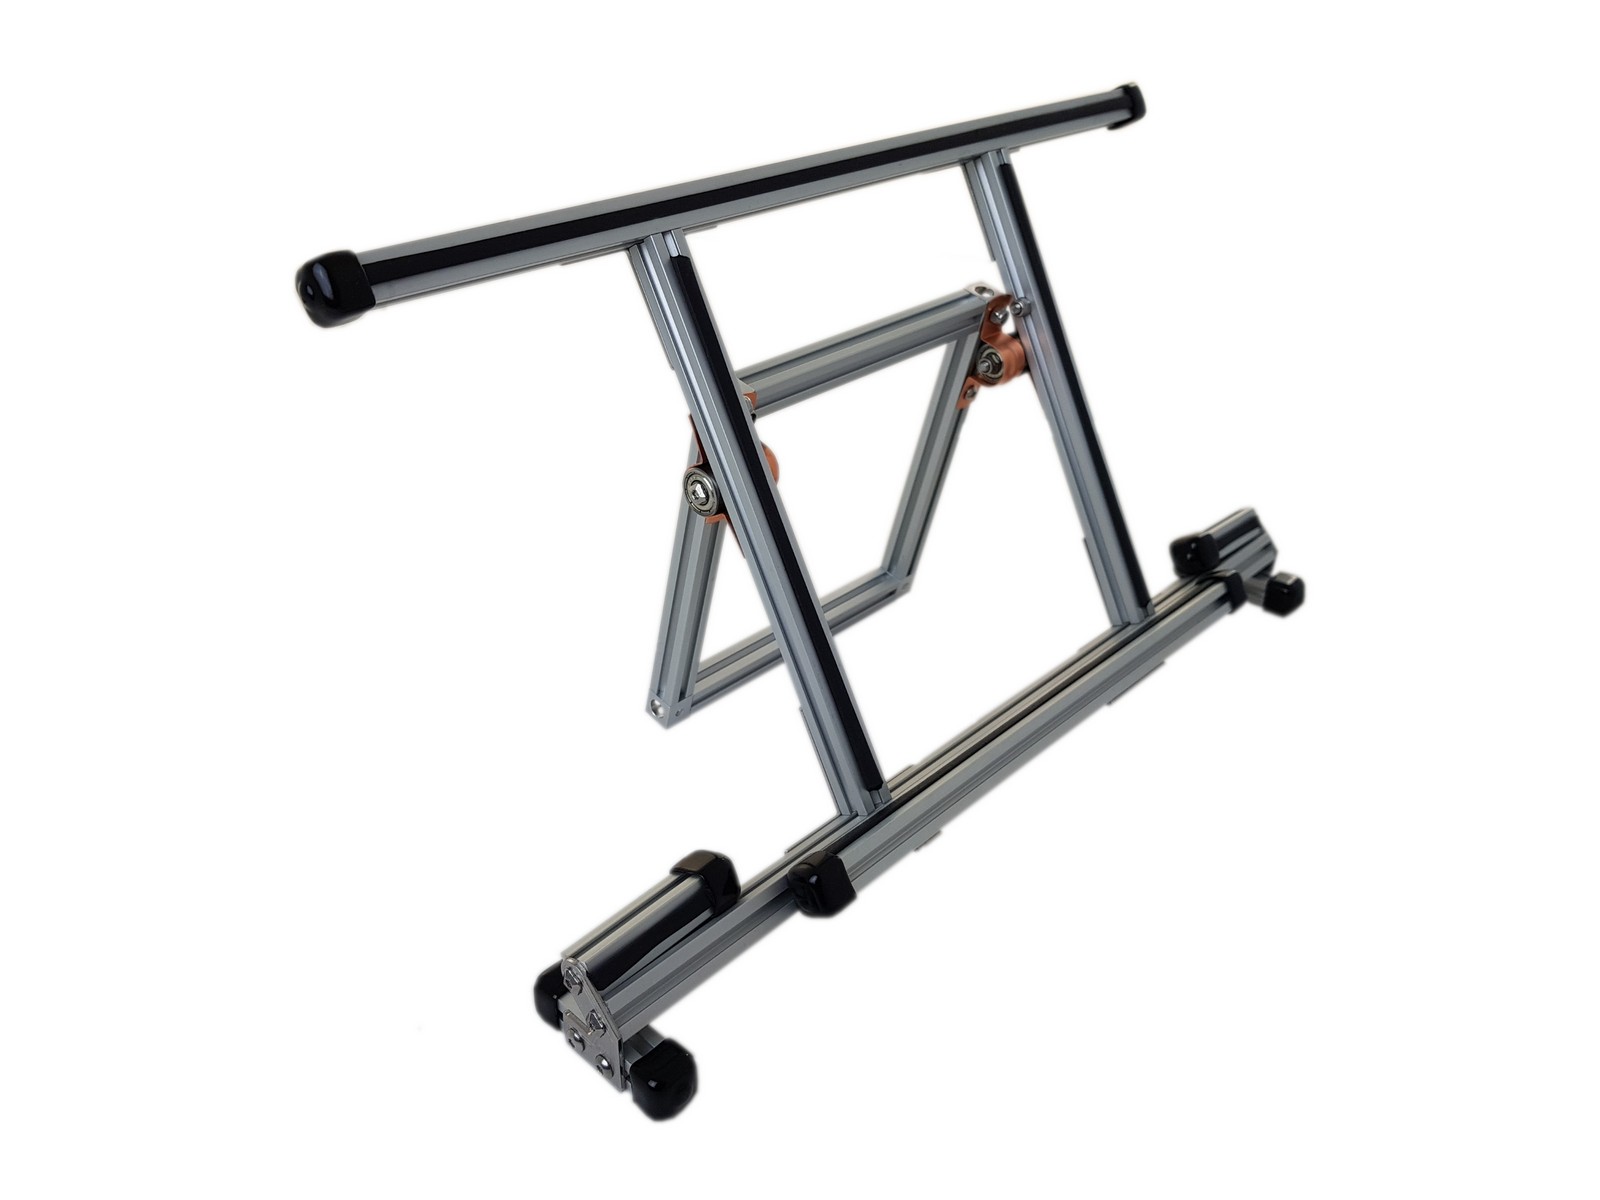
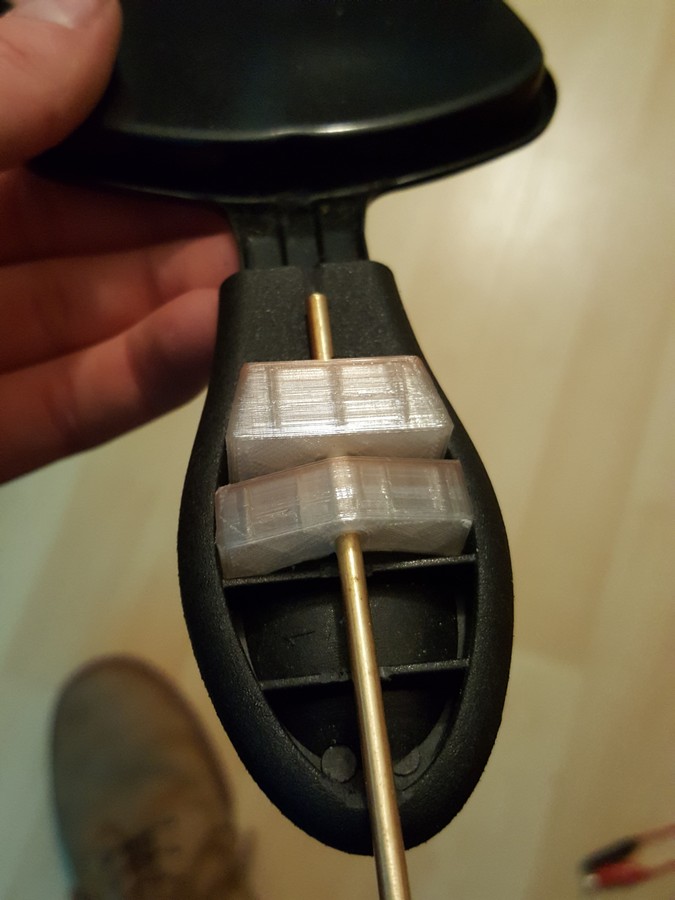
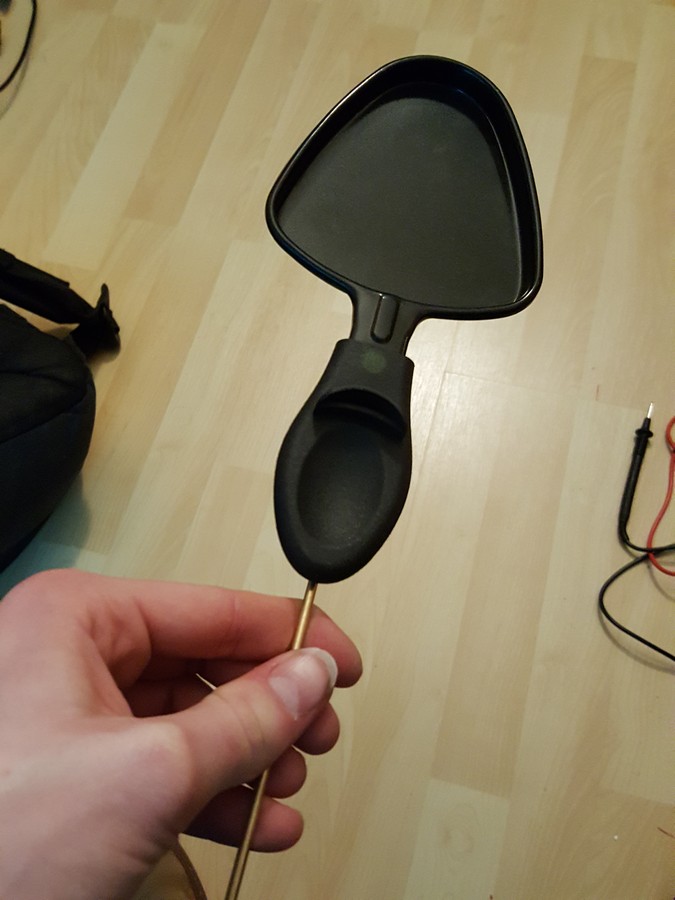
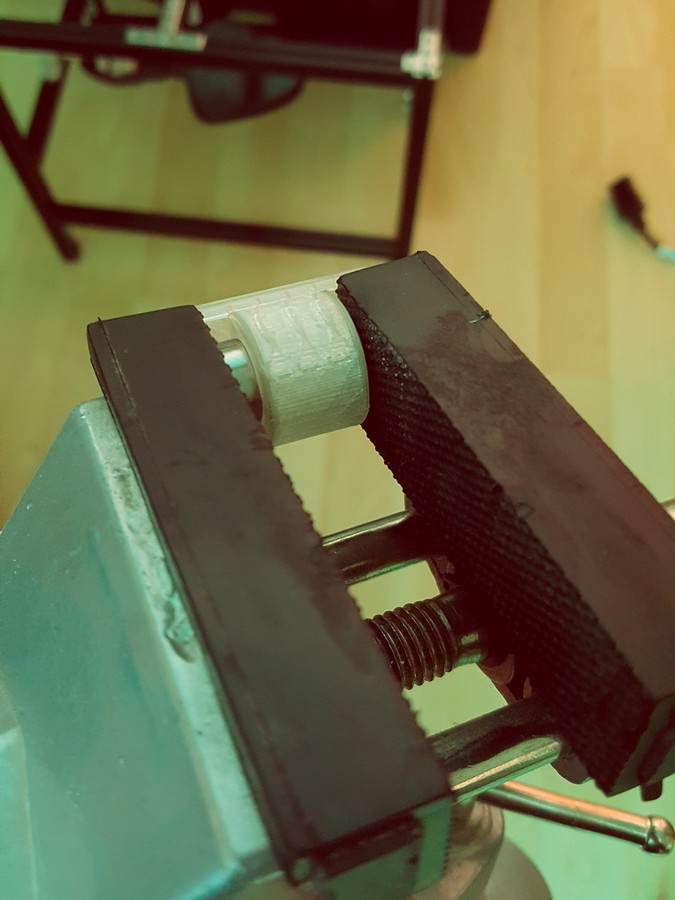
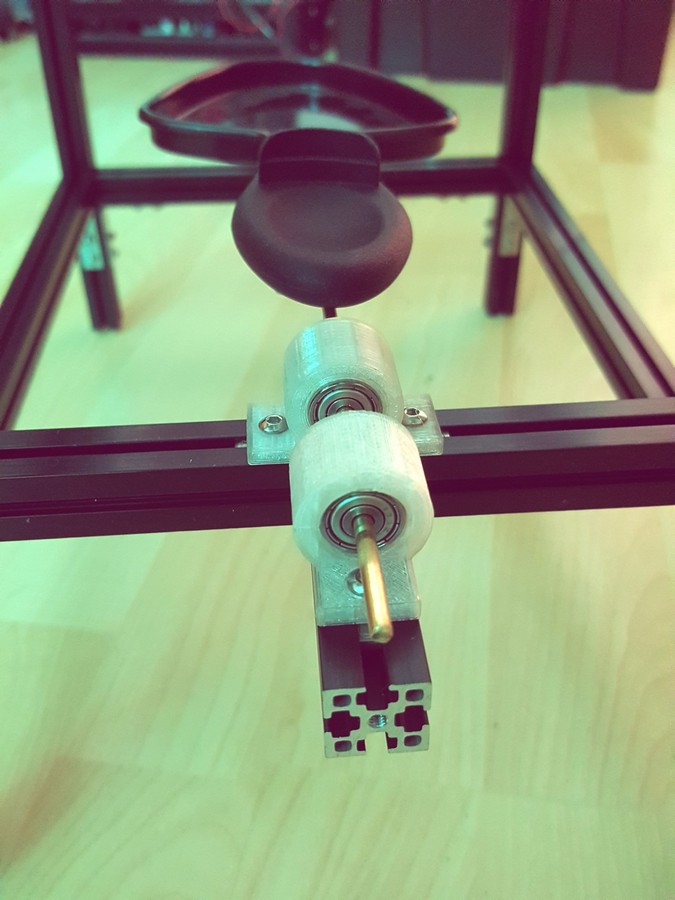
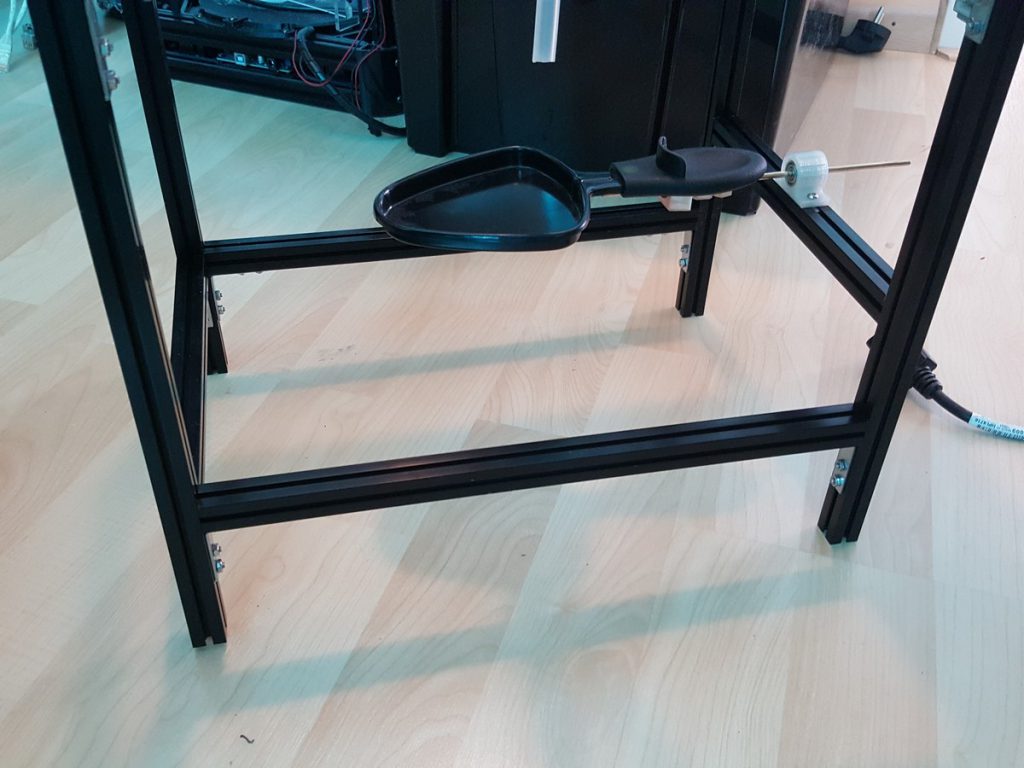
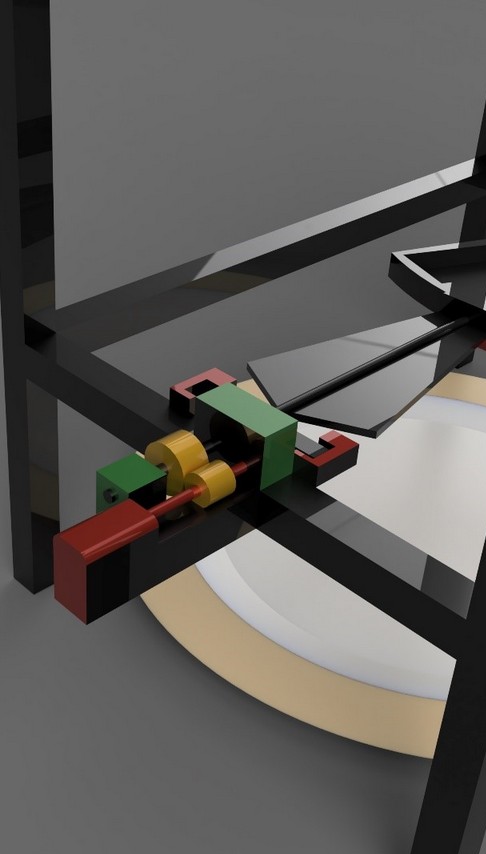
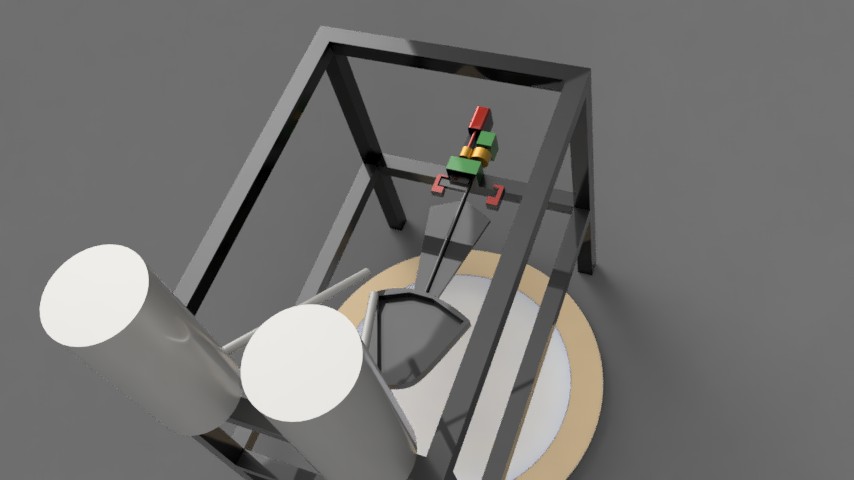
The aim was to have batter and oil come together in a pan that would be heated to bake the pancake. Then the pan was to automatically tilt so the baked pancake would slide off. Hendrik-Jan chose to use a small pan and attached an axis to the pan. He created brackets so the axis could be attached to the pan.
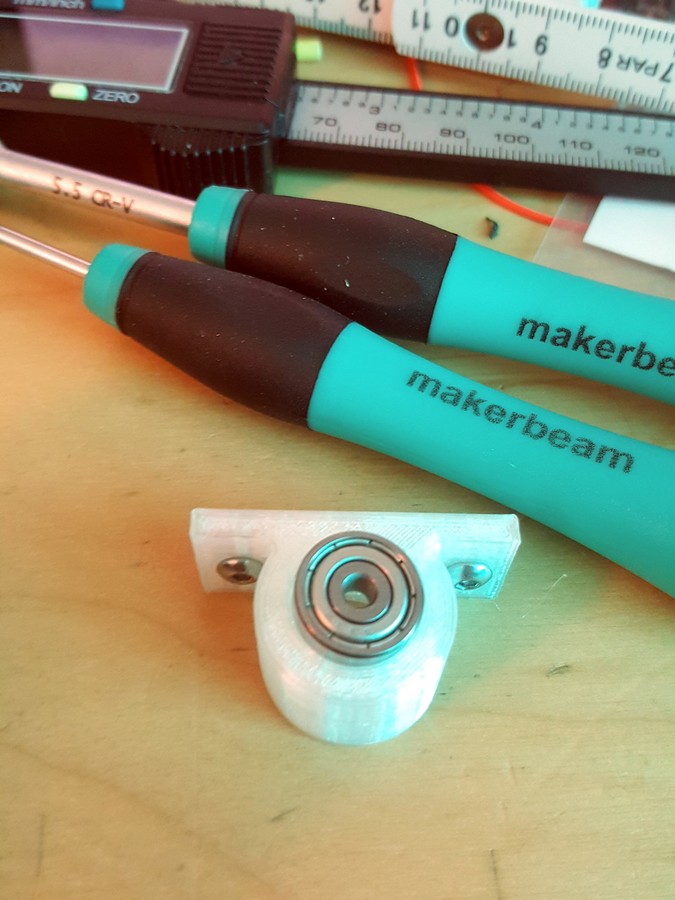
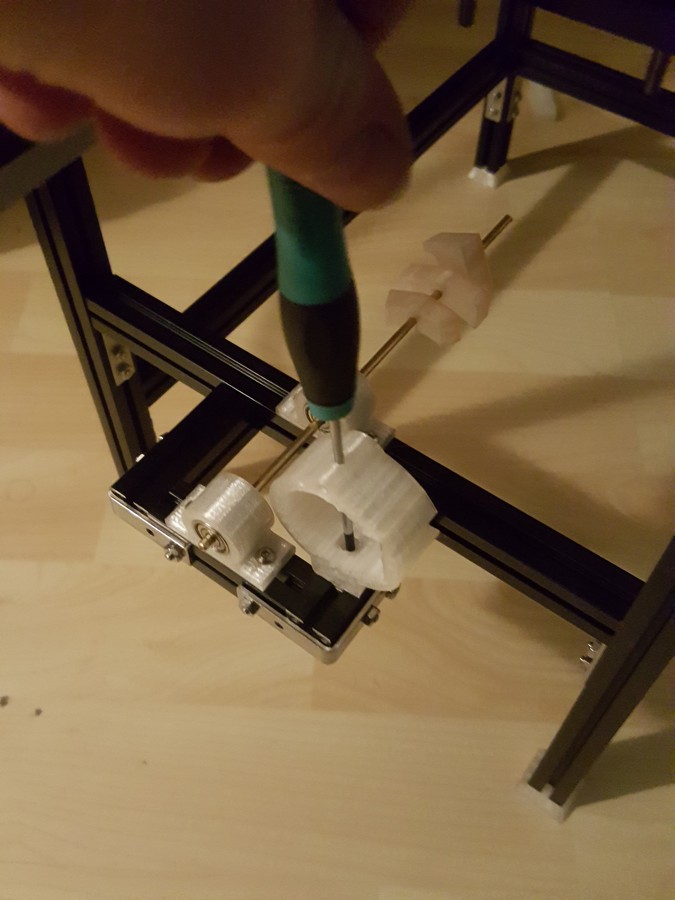
He used MakerBeam bearings so the pan could turn. He created a 3D printed housing for the bearing. The design for this bearing housing can be downloaded here: https://www.thingiverse.com/thing:3885358 (Thingiverse: DieZijner).
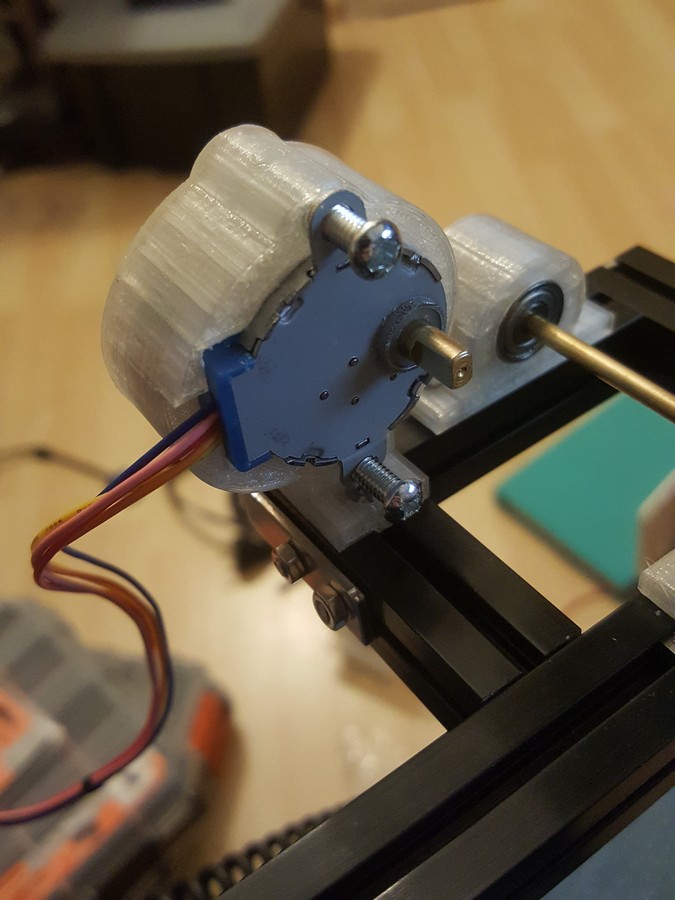
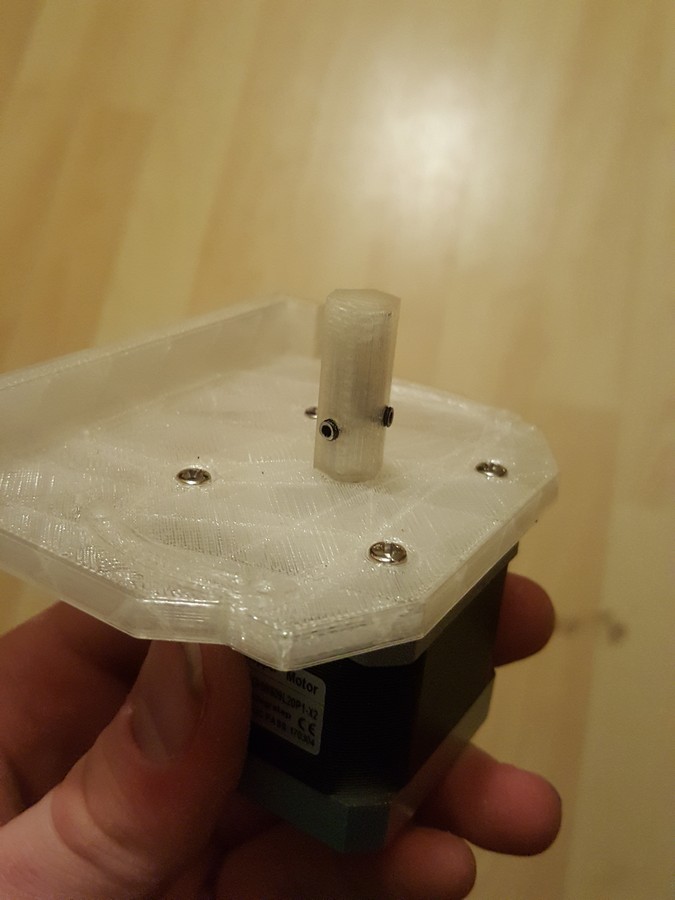
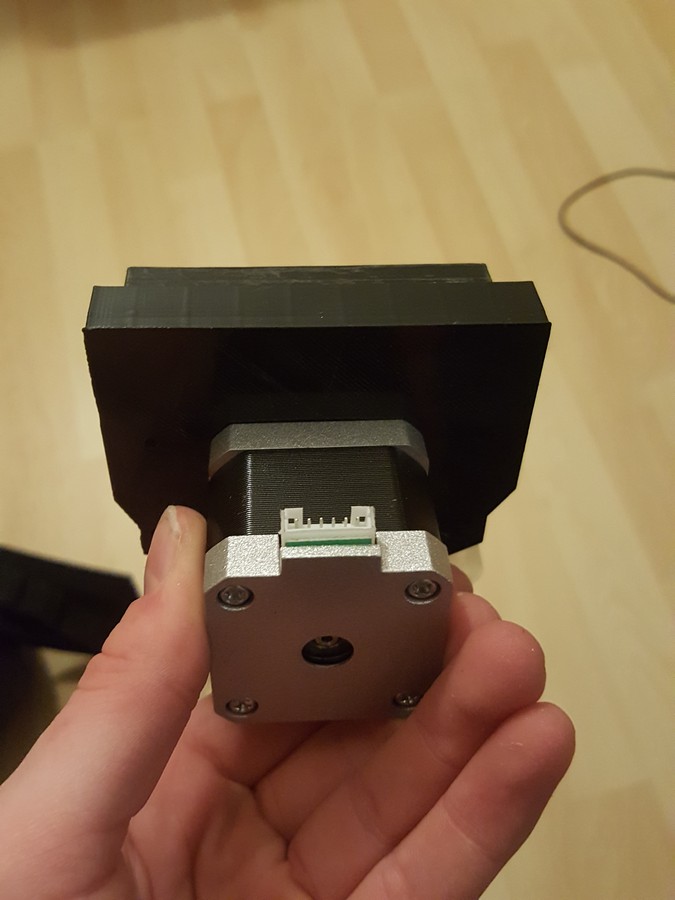
The next step was to add a motor for the rotation of the pan. Hendrik-Jan used a 28byj-48 stepper motor for which he created a motor mount also 3D printed. You can download the design for the motor mount here: https://www.thingiverse.com/thing:3885552 (Thingiverse: DieZijner).
At the time this was the only suitable motor he had laying around. Unfortunately the stepper motor was too weak. The pan could not turn around very fast or the motor would start skipping steps. Although the motor is made to be used on 5volts he even gave it 12 volts at one point. In a hope to give it some more power. This indeed worked, but obviously the motor quickly became hot. Next time he would definitely go with a NEMA17 instead, to avoid the challenges the 28byj-48 motor gave him.
Hendrik-Jan is a student who just started his bachelor studies in electronics September 2019. Hendrik-Jan made us a pancake machine.
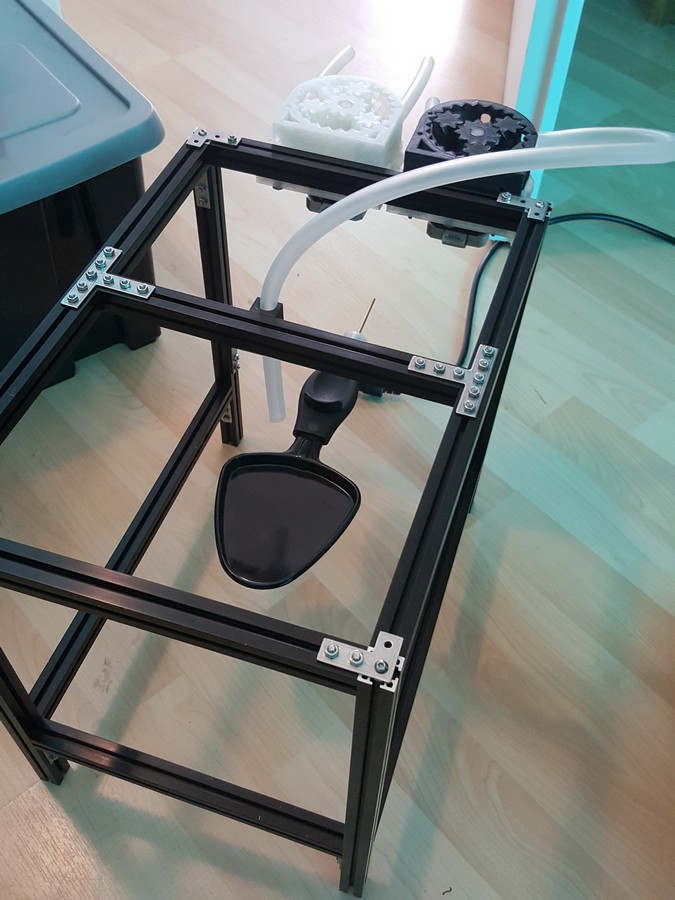
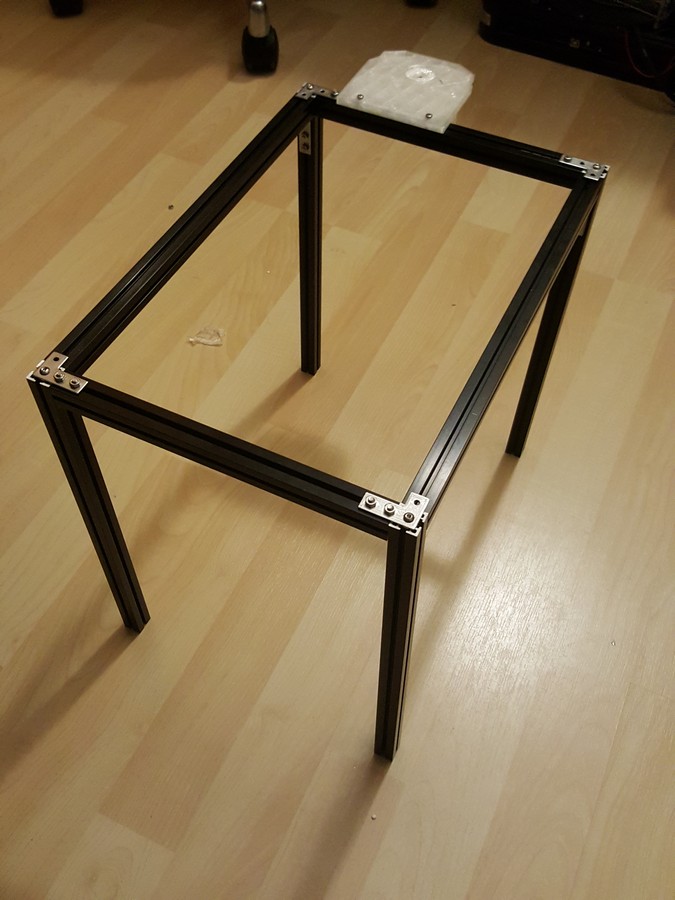
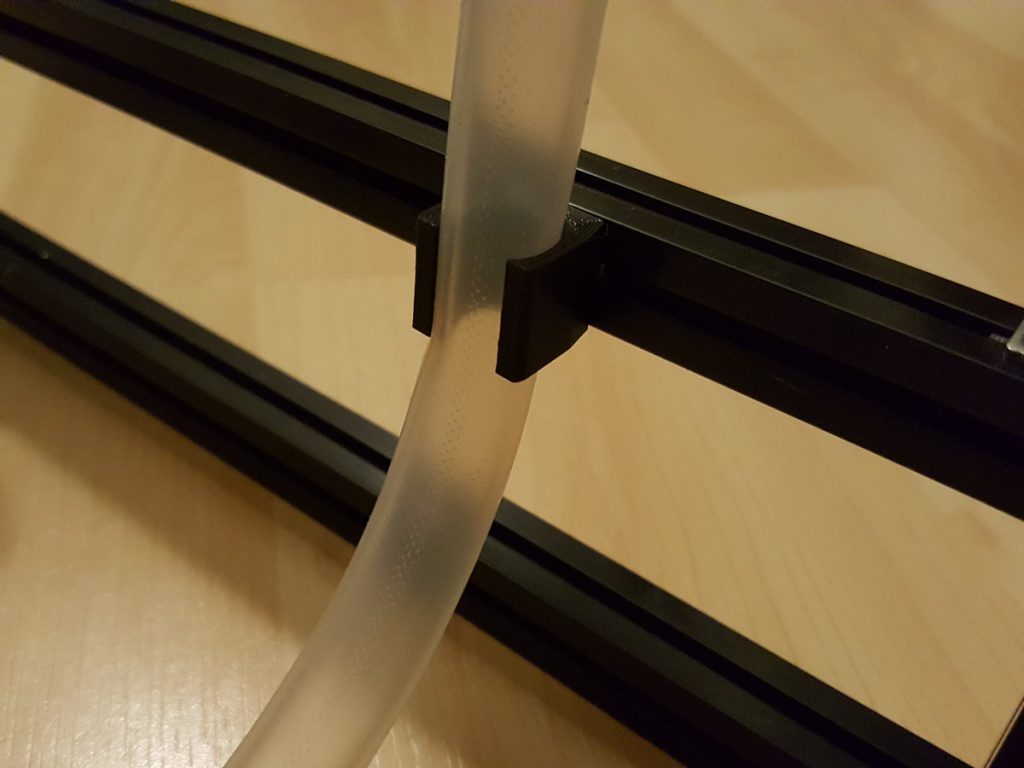
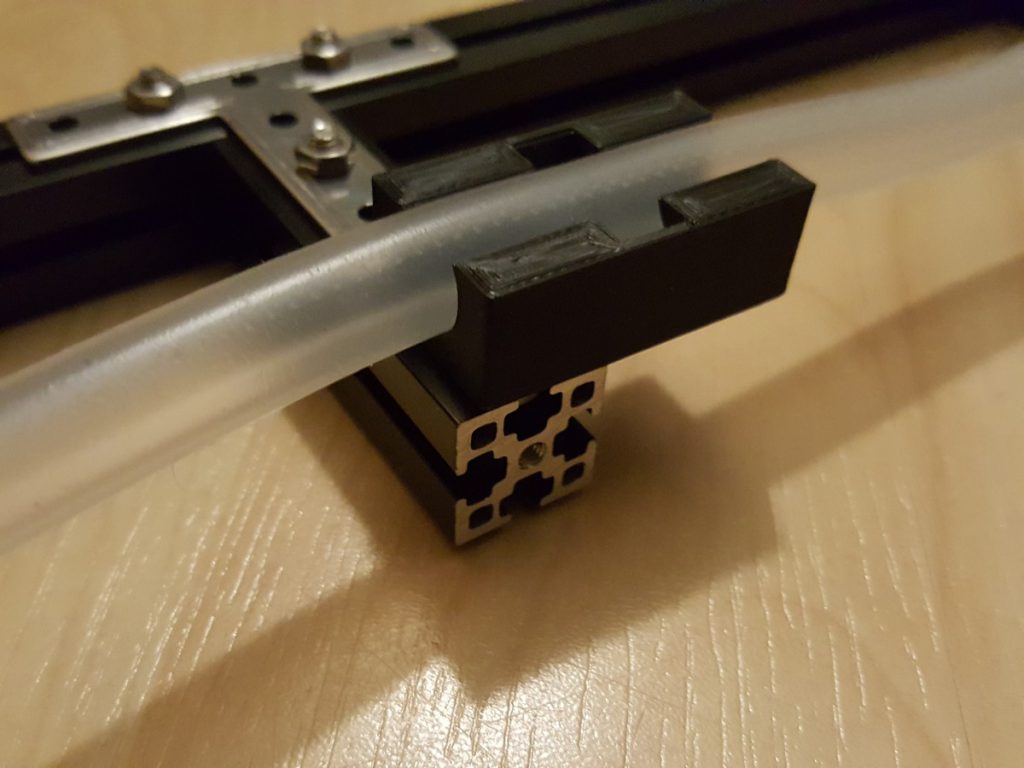
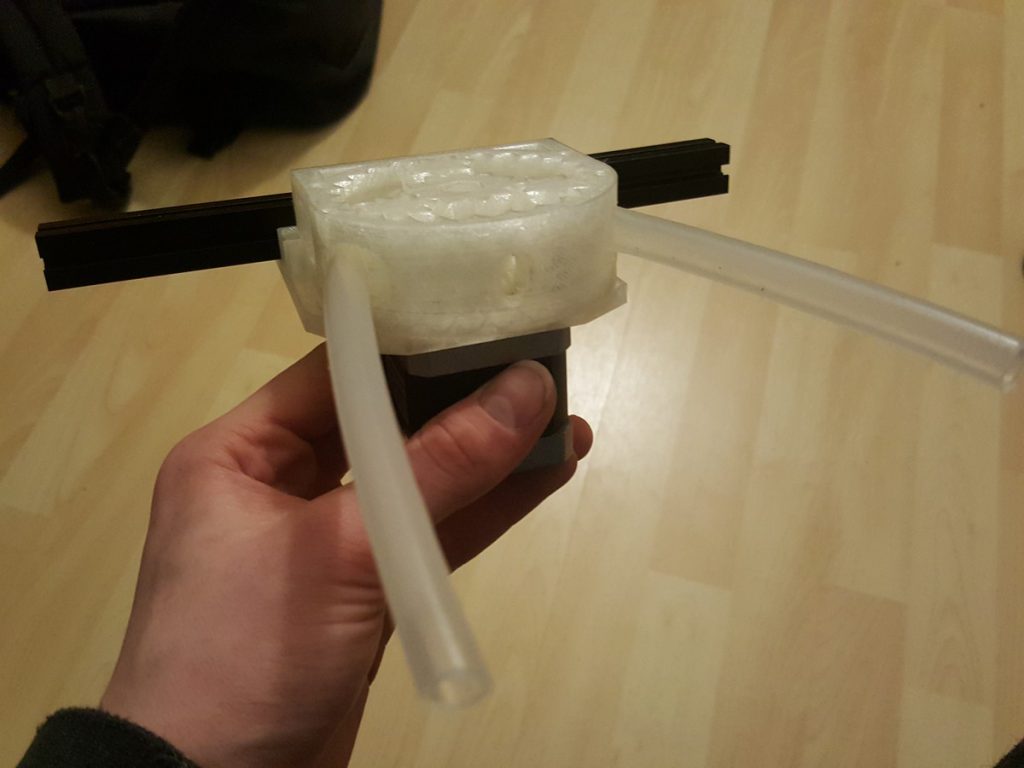
For his frame Hendrik-Jan used MakerBeamXL beams with MakerBeam brackets. Click here to go to our shop. The MakerBeamXL beams are 15x15mm in diameter and available in different lengths (max. 2000mm). MakerBeam aluminium profiles measure 10x10mm in diameter. These beams also are available in different lenghts (max. 1500mm). In the pictures you can see that the smaller MakerBeam brackets are not covering the MakerBeamXL beams entirely.
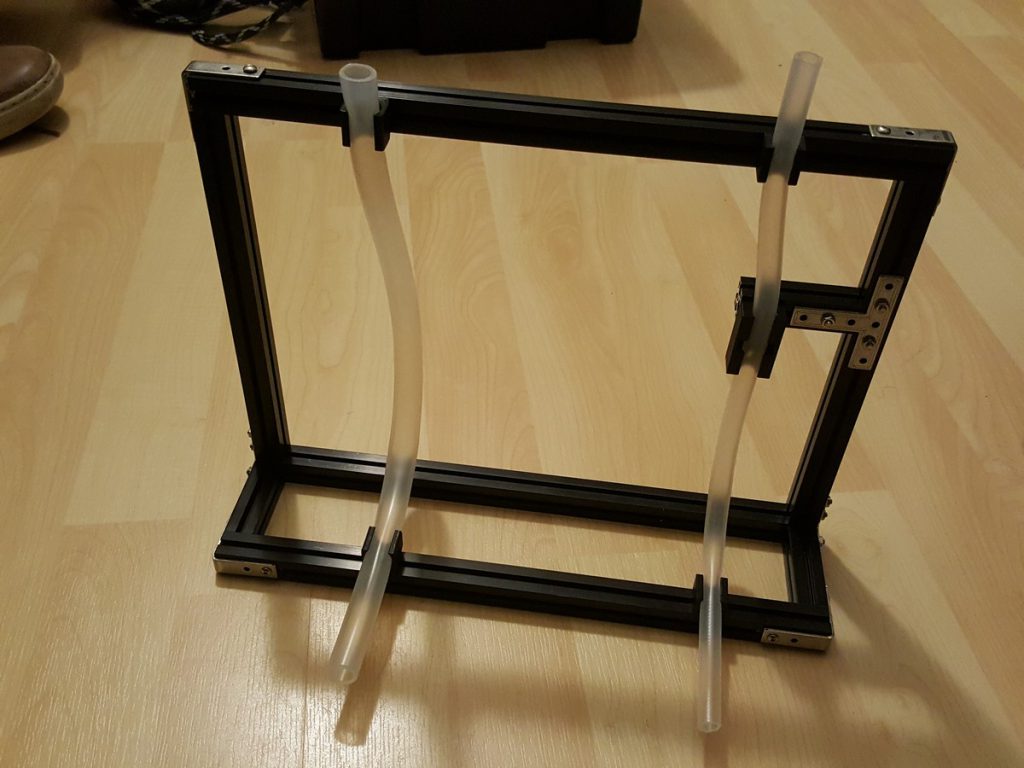
Hendrik-Jan also created brackets of his own. The design of these 3D printed tube holders can be found here: https://www.thingiverse.com/thing:3885119. The created brackets were used to guide the tubes.
Hendrik-Jan is a student who just started his bachelor studies in electronics September 2019. Hendrik-Jan made us a pancake machine.
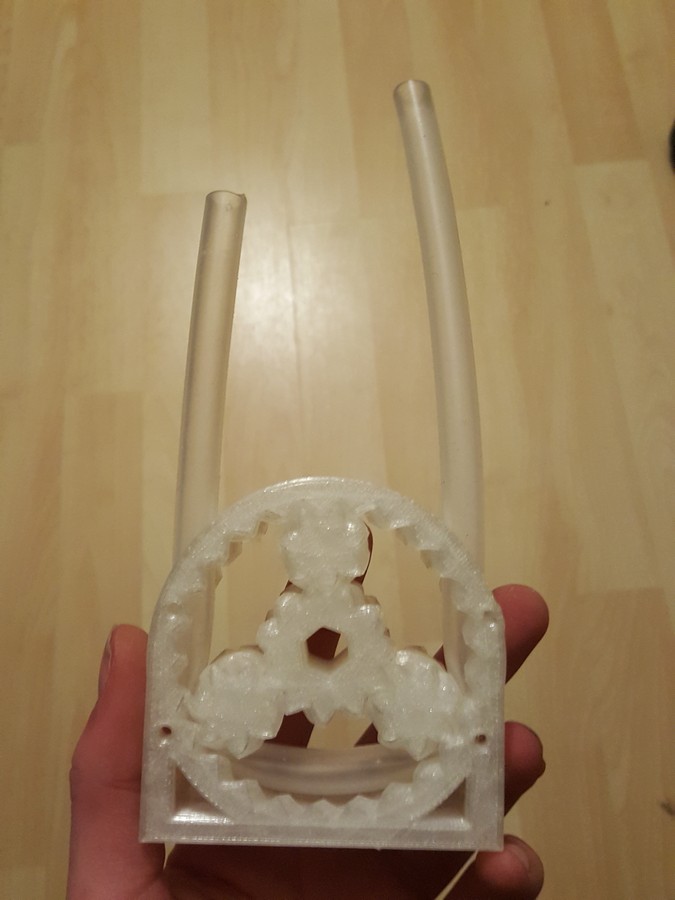
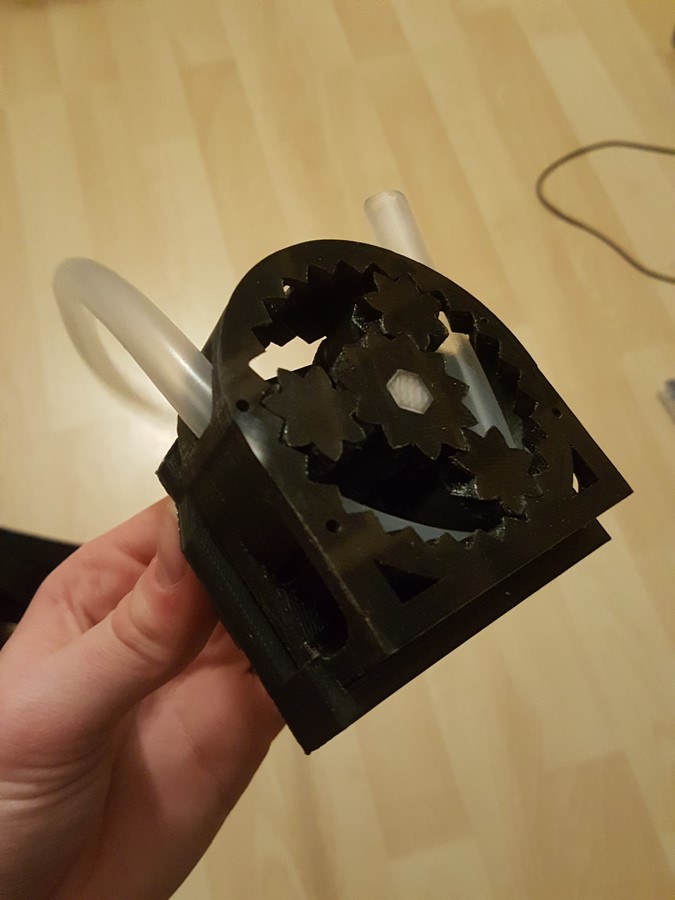
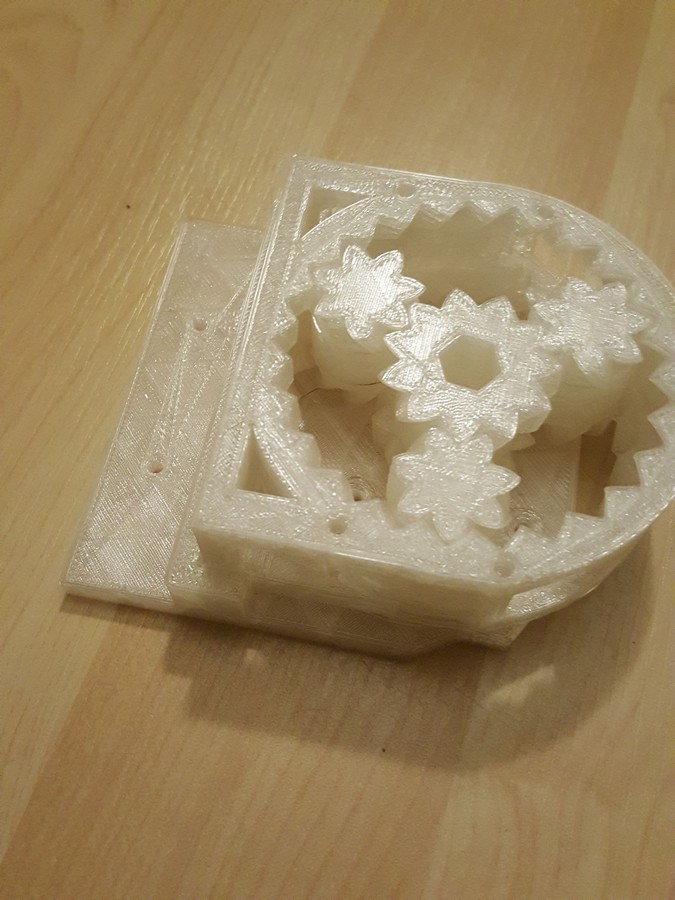
He first concentrated on creating the pumps to get the necessary oil and batter down to the pan. He created two 3D printed peristaltic pumps. Bigger sized versions from what Drmn4ea posted on Thingiverse. (Link: https://www.thingiverse.com/thing:454702 ). The gears and the body were altered, not just in size, but also to fit the tube in the pump. You can see his design here: https://www.thingiverse.com/thing:3885332. With a lot of grease added these pumps worked very well. See below for videos and pictures.
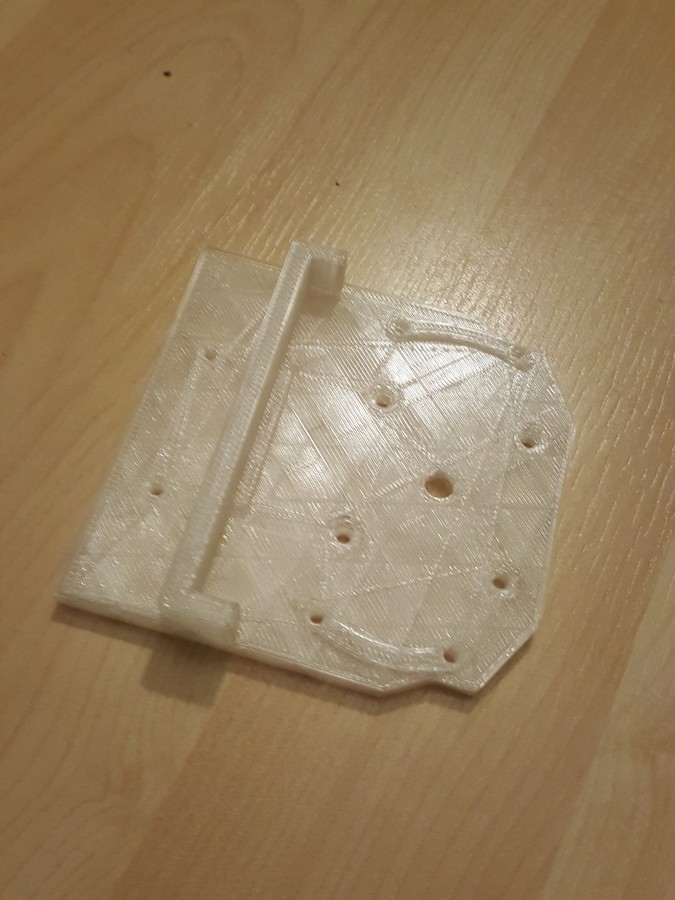
In order to fasten the pumps to the framework he created plates that could serve as brackets.
The use of MakerBeam profiles helped to divide all the different parts of the machine in separate projects. This meant Hendrik-Jan could focus on only one item, without really having to worry about the rest of the machine. All the different elements created in the differrent projects could be fastened on the frame anyway.
There are usually four steps in making a prototype. The first is to make a sketch. This way you get your idea on paper. The second is creating a virtual prototype. Going through all the stages and thinking some problems through helps the project along. What really helps is the third step, the creation of a physical prototype. The end result greatly benefits from actually building all the elements and solving every problem on the way. The fourth step, locating a manufacturer, is an optimistic one. It takes a lot of time before you get to this stage. Most of this time is dedicated toward prototyping since it normally means making a number of iterations. Not all of them as successful as you would like them to be.
MakerBeam is great to help you in the creation of a physical prototype and all the necessary iterations. The MakerBeam aluminium profiles and related hardware make it easy to create and alter a framework wherein electronics and 3D printed custom made designs can be combined into one.
The first prototype We asked Hendrik-Jan to create us something using MakerBeam. Hendrik-Jan is a student who just started his bachelor studies in electronics this September. The aim was to create something with MakerBeam. Delivering a machine in working order was not the criterium for failure or success. It was the creation of a prototype we were after, the very first. A lot of prototypes do not make it to the finishline – a working model as input for the manufacturer – but are necessary steps in the process nonetheless. Materials used and problems solved along the way give a lot of valuable information.
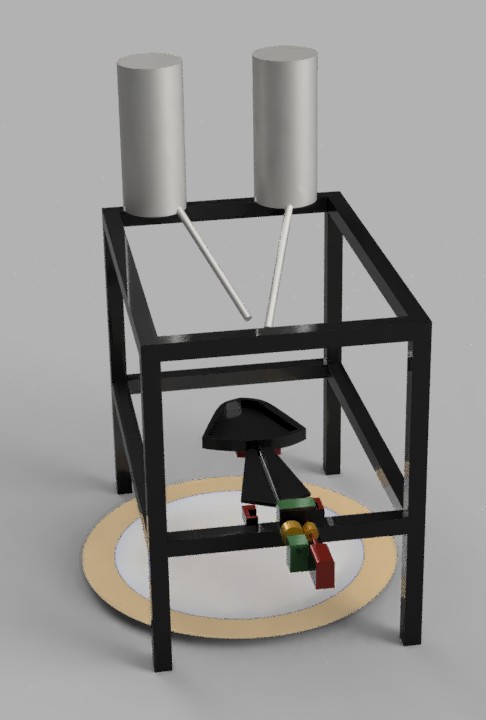
Hendrik-Jan made us a pancake machine. The goal was to have a machine in which you put batter and oil with the machine baking a pancake for you and then delivering it on your plate.
Below are his first sketches in render, basically step one and two combined. He sketched the idea he had to see whether it was a realisitic plan, and to have it on paper. The making of his pancake machine will be published in a series of 7 posts. This one being the first.
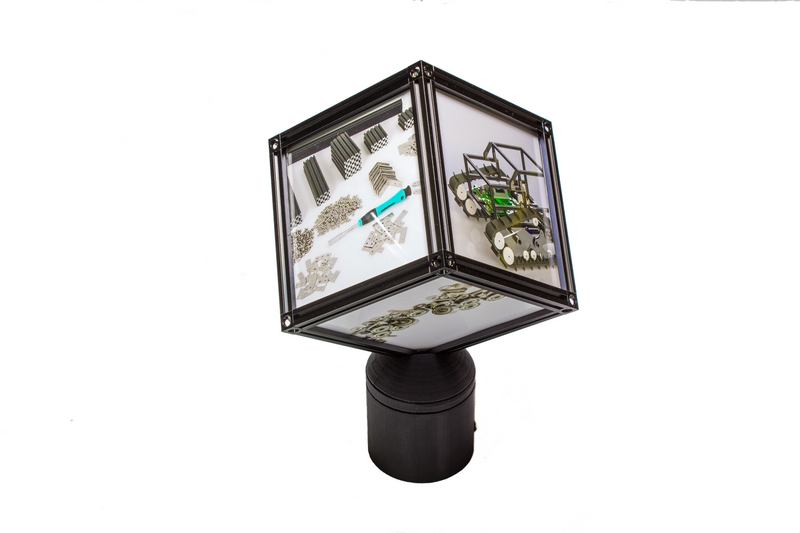
Stefan Gschroefl from ConstrAct sent us a few pictures from his rotating MakerBeam cube. It looks great.
The cube is made using MakerBeam. It now holds pictures of MakerBeam items and projects. Stefan is planning to attend the MakerFaire in Vienna in early May.
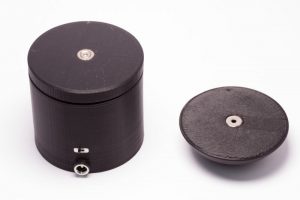
The rotation platform is custom 3D printed and runs slow. The rotation platform is powered by battery or external power source. It can be used for other things since the cubeholder itself is magnetic mounted.